/
Outlook 365 - Create A Shared Calendar
Outlook 365 - Create A Shared Calendar
- Addison Morris
Owned by Addison Morris
Create Calendar
From Outlook 365 :
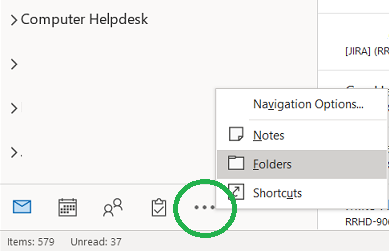
- Select the 3-dot menu and choose Folders.
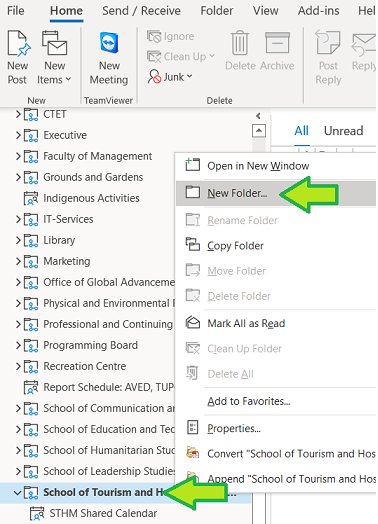
- Find the folder for your team :
Expand Public Folders
Expand All Public Folders
Expand Staff - Right-click your team folder and select New Folder...
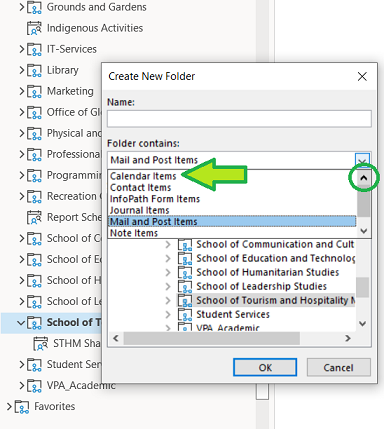
- Select Calendar Items from the Folder contains drop-down (Scroll up).
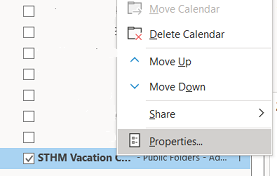
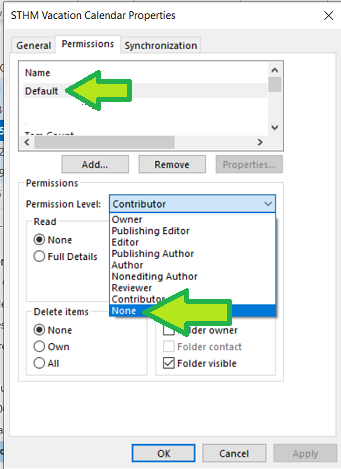
- Right-click the new calendar and select Properties.
- Select the Permissions tab.
- Change the Permission Level for Default to None. This will apply to Anonymous as well.
Copy Events
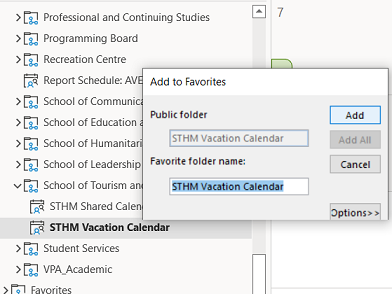
If you already have a calendar and need to move the events into a new calendar :
- Right-click on the new calendar and select Add to Favorites.
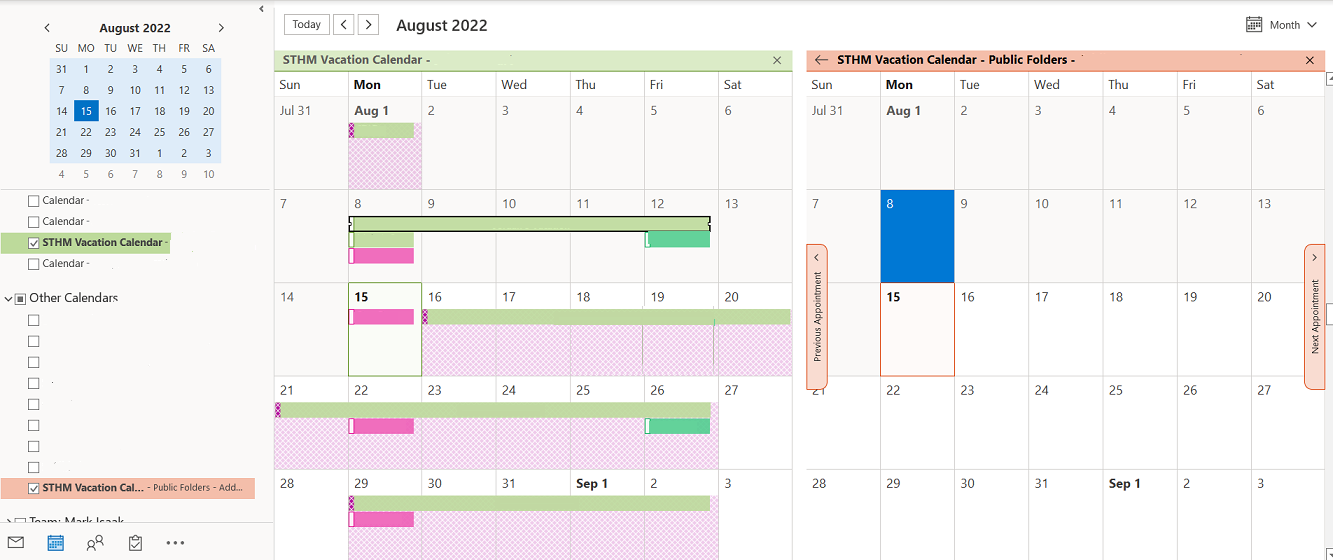
- Navigate to the calendar page.
- Select the checkbox next to each calendar to get a side-by-side view.
- Drag-and-drop events to copy or move them.
Related articles
Related content
Outlook - Sharing a Calendar
Outlook - Sharing a Calendar
More like this
About Microsoft 365 for RRU employees, contractors, and students
About Microsoft 365 for RRU employees, contractors, and students
Read with this
Sharepoint - Manage Access
Sharepoint - Manage Access
More like this
Remove a Name from the Team List in Outlook Calendar
Remove a Name from the Team List in Outlook Calendar
More like this
OneNote: organizing and sharing information
OneNote: organizing and sharing information
More like this
New Features in Outlook and Outlook Web App
New Features in Outlook and Outlook Web App
More like this
How to Contact the Computer Services Department
Submit a ticket
To submit a ticket, you will be required to log in using your FULL Royal Roads email address (detailed instructions here)
New! If you do not have a full RRU email address (students not currently in a credit program and/or visitors), you can create a portal account using your personal email address.
Email us at IT Customer Service
Contact Form
Phone: 250-391-2659 Toll Free: 1-866-808-5429
Come visit us in the Sequoia Building
Hours of Operation