Moodle - Choice Activity Sign-up Sheet (staff/faculty)
![]()
This document explains how to setup a sign-up sheet for students using the Moodle Choice activity.
Note that if Choice is set to separate groups that this creates a separate Choice activity for each group where the group members individually make choices within their groups; it does not allow individuals to make choices for their groups. If you would like individuals to make choices for their groups then a sign-up-sheet-table in a wiki activity may be the best solution.
Steps
1. Create your Choice activity. Fill in the Choice name and Description.
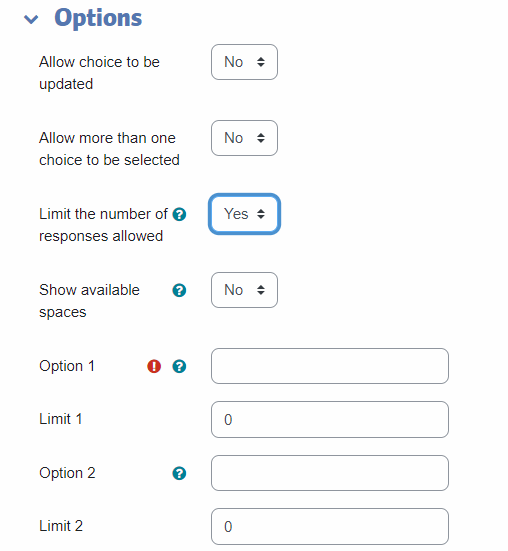
2. Configure the Choice settings:
- Display mode for the options: Set this to Display vertically. This is best for longer lists of options.
- Allow choice to be updated: Leave this set to No unless you want students to be able to change their mind on what time slot they have signed up for.
- Allow more than one choice to be selected: Leave this set to No unless you want students to be able to choose more than one time slot Option.
- Limit the number of responses allowed: Set this to Yes if you want to limit the number of students who can sign up for each time slot Option.
3. Fill in the Options for each date and time that is available.
4. Set each Limit to the number of students or student groups that may sign-up for each time slot Option.
5. Under Results, in the Publish results menu, consider your options. These options will determine whether students can see the results and when they can see the results. If you want the results always visible then choose Always show results to students.
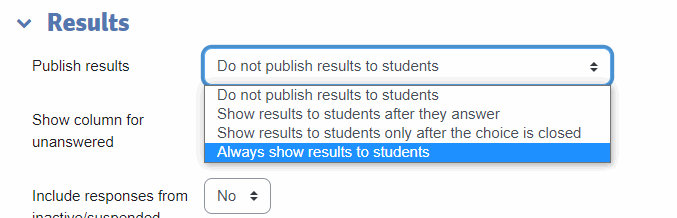
Also under Results, in the Privacy of results menu, consider your options. If you want students to see which students have signed up for what times then use Publish full results, otherwise choose Publish anonymous results.

Results
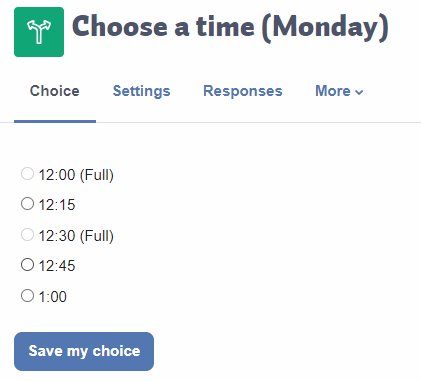
Once you have setup the Choice settings, it might look like the following when students use it. Students will see which time slots are currently full (they have reached their limit) and can choose an available time slot that will work for them. Students can, at any time, return to the Choice to see which Option they chose.
The instructor can view student responses by clicking on the Choice and then clicking the View responses button. To view the results in a spreadsheet click Select all and then click the Download in Excel format button.
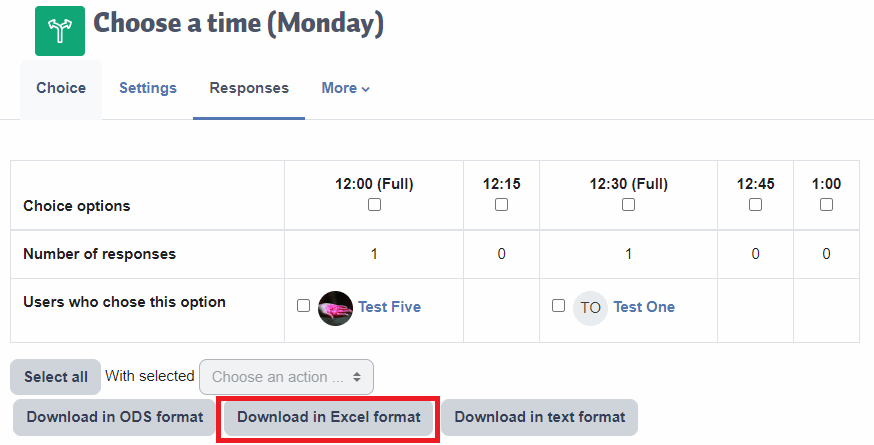
The spreadsheet will show the students' Surname, First name, Group (if applicable), and Choice.


Content on this page is licensed under a Creative Commons Attribution-ShareAlike 4.0 International license.
How to Contact the Computer Services Department
Submit a ticket
To submit a ticket, you will be required to log in using your FULL Royal Roads email address (detailed instructions here)
New! If you do not have a full RRU email address (students not currently in a credit program and/or visitors), you can create a portal account using your personal email address.
Phone: 250-391-2659 Toll Free: 1-866-808-5429
Come visit us in the Sequoia Building
Hours of Operation