WebSpace - Take Your WebSpace With You When You Graduate
Please note: WebSpace sites have been created only for students enrolled in a specific course or program that uses it. WebSpace sites are not automatically created for all RRU students. If it hasn't been used in your program, you will not have a WebSpace site and do not need to log in to export any content.
Topics Covered In This Article
- Hosting
- Exporting Your Content
- Importing Your Content
- Final Steps
Hosting
When moving your WebSpace content, you can either open:
- a free account on WordPress.com, or
- a free account on Edublogs.org, or
- pay for an account with a web hosting company
This article will show how to import your content your WordPress.com account. If paying for a hosting company, once you have WordPress and the Importer installed the steps should be similar. Please contact the host company for any other questions.
Open and create a WordPress.com account and site
To open a WordPress.com account, click their Get Started link and select the theme that you are using or one close to it.
Not all themes on WebSpace are available on WordPress.com. If you are using one of the premium Elegant Theme themes, choose a theme that closely matches what you are using on your WebSpace.
If you wish to continue using a Elegant Themes theme or the Divi Builder plugin, a license will need to be purchased from them, and an external a web hosting account set up with WordPress installed on it.
Exporting Your Content
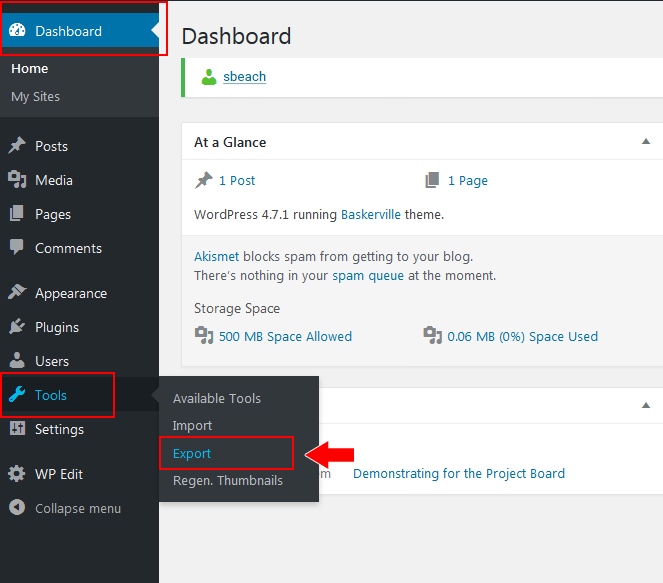
Step 1:
- Go to your Dashboard on your WebSpace and select the Export item from the Tools section.
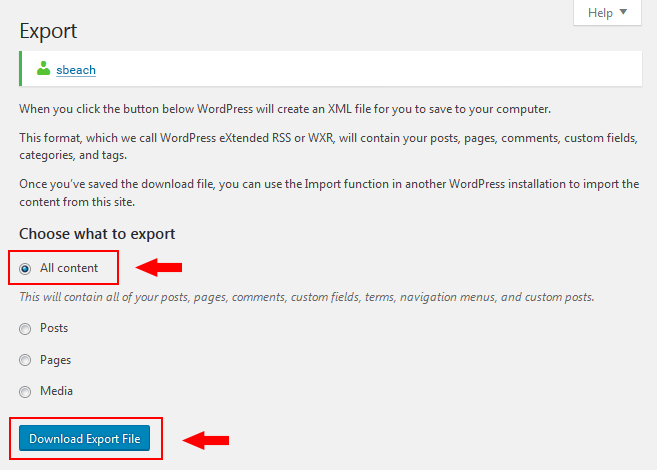
Step 2:
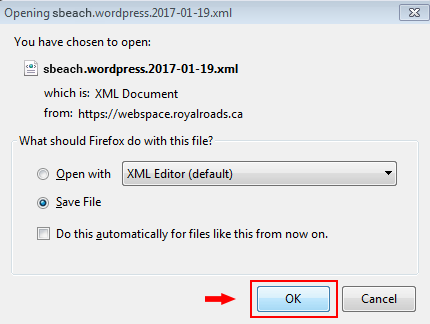
- Leave All content selected and click the Download Export File button. An XML file will be created. Download it to your computer and go to your WordPress.com site.
Importing Your Content
There are two ways you can to import your content on WordPress.com.
- Using the My Site dashboard, or
- WP Admin dashboard (the colours and layout are similar to your WebSpace dashboard)
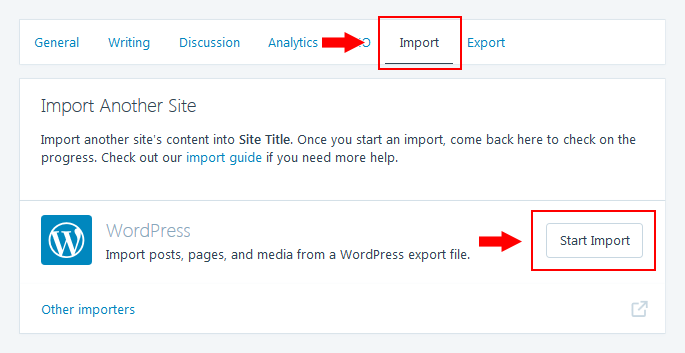
Option 1: My Site Dashboard
Step 1:
- Log into your WordPress.com site
- Click on My Site, then click on Settings
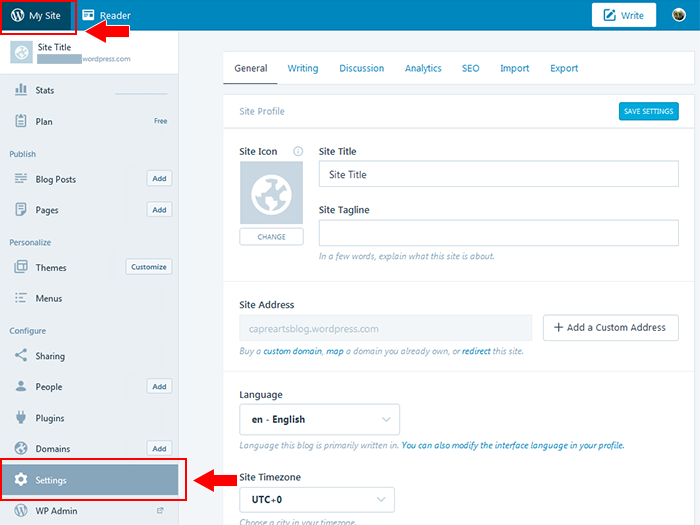
- Select the Import tab, then click Start Import
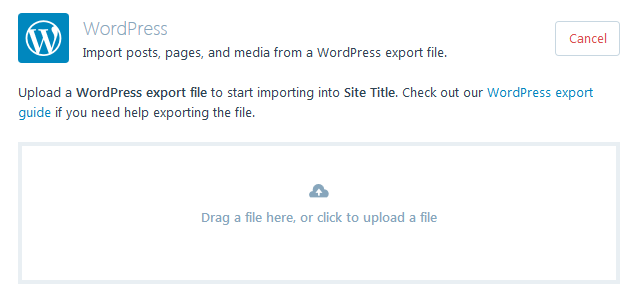
- Find the xml file that you downloaded to your computer
- Drag the xml file into the box or click to upload the file
- Click Start Import
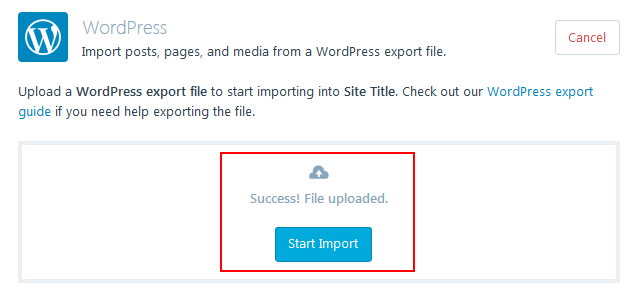
- Follow the steps and click Done.
- Click on Pages and Posts to see your imported content.

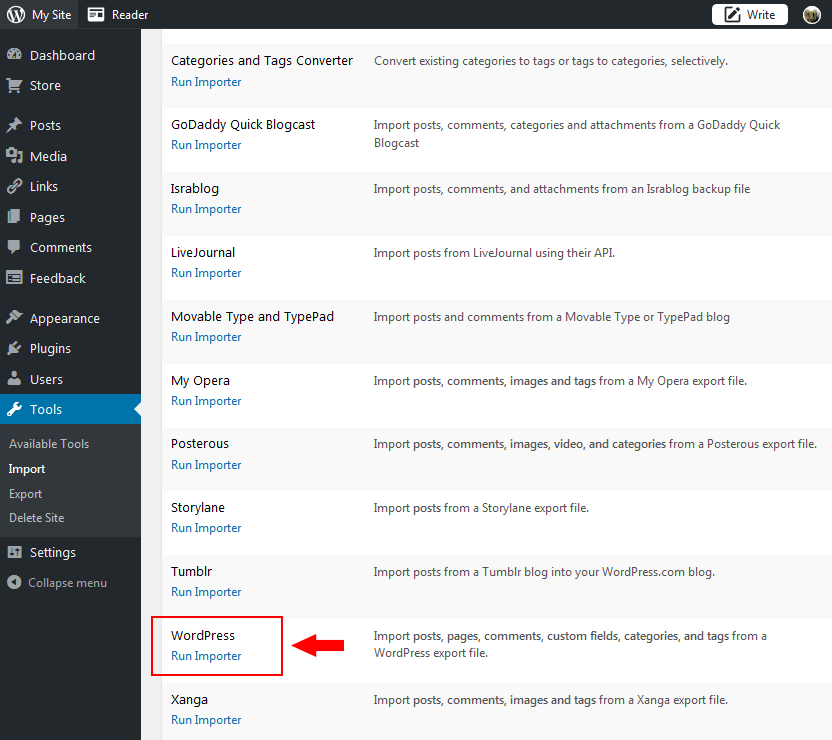
Option 2: WP Admin Dashboard
Step 1:
- From My Site, scroll down and select WP Admin
- Or, type in wp-admin at the end of your web site's url, e.g. sbeach.wordpress.com/wp-admin

Step 2:
- From the Dashboard, select Tools, Import

Step 3:
- Click Run Importer
Step 4:
- Select Browse and upload the downloaded WebSpace xml file
- Once the file has been uploaded, click the Upload file and import button

Final Steps:
Once you've imported your content using one of the above methods, go through and re-setup some of the site elements. To easily compare and sync up the settings, open your WebSpace Customizer open in another Window or Browser.
- In another window, open your Wordpress.com site and select the Customizer, now you can run a comparison between the Wordpress and Webspace sites:
- Update the Site Identity information and Logo
- Select your primary menu
- Select any header and background images
- Set up your widgets
- Set up the Static Front page again if needed
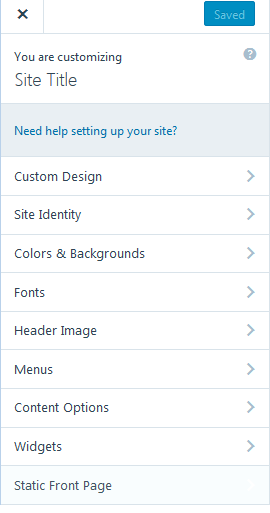
- Go to Pages, Posts and your Media Libary to view and check .your imported content
Note:
If you have been trying out the Divi Builder plugin, after importing you will some text in brackets, similar to this:
[et_pb_section admin_label=”section”][et_pb_row admin_label=”row”][et_pb_column type=”2_3″][et_pb_text admin_label=”Text” background_layout=”light” text_orientation=”left” use_border_color=”off” border_color=”#ffffff” border_style=”solid”]
Since WordPress.com does not offer this plugin any images or text will need to be re-selected and fixed.

Content on this page is licensed under a Creative Commons Attribution-ShareAlike 4.0 International license.
Related Articles
How to Contact the Computer Services Department
Submit a ticket
To submit a ticket, you will be required to log in using your FULL Royal Roads email address (detailed instructions here)
New! If you do not have a full RRU email address (students not currently in a credit program and/or visitors), you can create a portal account using your personal email address.
Phone: 250-391-2659 Toll Free: 1-866-808-5429
Come visit us in the Sequoia Building
Hours of Operation