WebSpace - Customizing The Appearance Of Your WebSpace
- Jason 1keddie
- Jeremy Fuller
- Cathy Pretorius
- Daniel Nelson (Deactivated)
Topics Covered In This Article
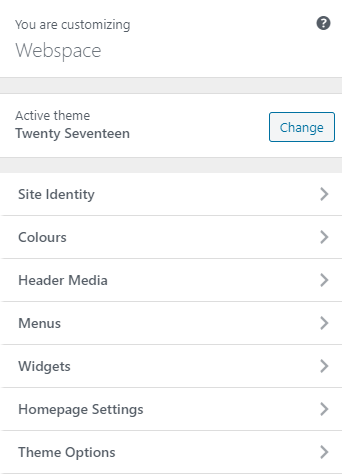
Customize
Customize offers customization options for your currently selected theme. Here you can change site titles, colours, header images, menus, widgets, etc to make the site your own. Note: each theme has a slightly different set of options. The screenshots below are for the Twenty Fifteen theme.
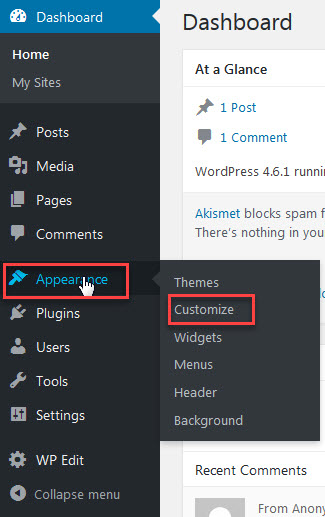
View Customizer
You can access customizer from Appearance > Customize.
Please note, the Customize Screen is only available if the active theme supports a Customize ability and it will likely be different for each Theme.
The Theme Customizer allows you to preview changes to your site before publishing them. You can also navigate to different pages on your site to preview them. At the bottom of the Customizer pane, you can find Device Preview Buttons that shows how your site looks in mobile, tablet, and desktop contexts.


Device Preview Buttons
![]()
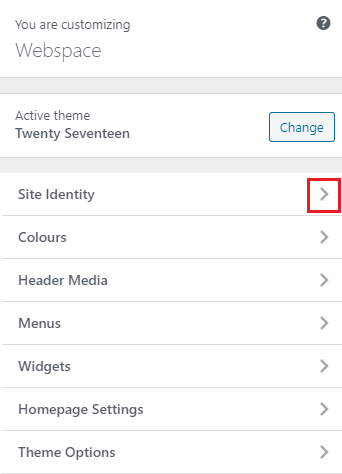
Site Identity (Changing the title of your site)
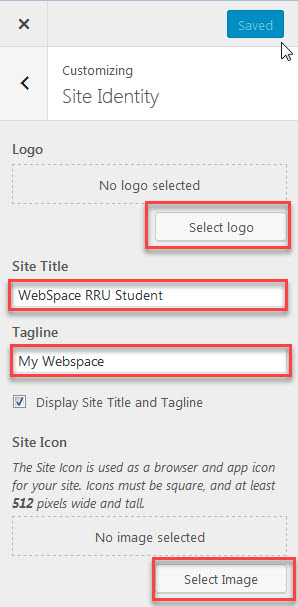
Site Identity menu allows you to specify basic site information. You can customize your site identity by adding a logo, change the name/title of your site, tag line, and adding a site icon.
- Logo - Site logo image such as corporate symbol
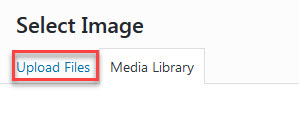
Click Select Logo to open the Media Library. Select an image from it or upload the new image from Upload Files Tab screen and click Select at the bottom right. Then you can crop the image or skip this step. Click Remove or Change logo to remove or change site logo image. - Site Title - Text box for site title
- Tagline - Text box for tag line
- Display Site title and tagline - Checkbox to enable or hide the display of title and tag line
- Site Icon - The Site Icon is used as a browser and app icon for your site. Icons must be square, and at least 512 pixels wide and tall.
Click Select Image to open the Media Library. Select an image from it or upload the new image from Upload Files Tab screen and click Select button at the bottom right.
Add Images (Header and Background)
You can upload your own image header to personalize the look and feel of your site.
Note: Pay attention to the standard size for header image.
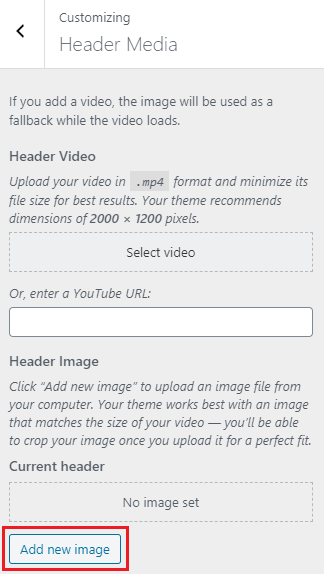
How to add a header image:
- Add new image - Click this button to open Choose Image dialog box. You can choose an image that is already in your Media Library, or upload image file from your local computer in Upload Files tab screen. After selecting the header image, click Select and Crop button to go to Crop Image dialog box.
The Crop Header Image feature allows you to select an area of an image and then delete all but that selected area. When initially displayed, WordPress shows that maximum sized crop area in a lighter shade. When using a theme such as the WordPress Twenty Fifteen theme the header image is expected to be 954 x 1300 pixels so that is the size of the selected area shown. You can click, hold, and drag the lighter crop selection area and down (or up) the image to the desired point. Also, you can click one of the eight crop resizer boxes (little square box on each corner and each side) to move the crop selection area.
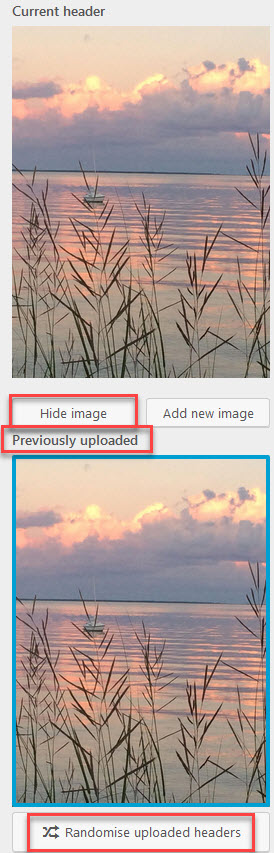
Once you add a header image you will get some more options:
- Hide image - Click this button to remove the header image.
- Previously uploaded - Select from images that you have already uploaded. If you want to remove an image, move the cursor on the image and click Close button at the upper right corner.
- Randomize uploaded headers - Click this button to show random header image files on every page load.
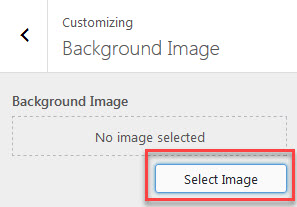
How to add a background image
Select an optional background image to use in place of the solid colour specified in Colours above. Please note that you need to be using a Theme that supports a background image for this option to appear in the Customize menu.

Once you add a background image you will get some more options:
- Remove - Once an image is uploaded, if the image is no longer desired, use this button to remove the image. You will not be able to restore any customizations.
- Change Image - Click this button to change the background image.
- Background Repeat - Check Radio button to determine if image is repeated. Choices are No Repeat, Tile, Tile Horizontally, or Tile Vertically.
- Background Position - Check appropriate Radio button to allow image to be positioned Left, Centre, or Right
- Background Attachment - Radio button to Scroll background or display as Fixed.

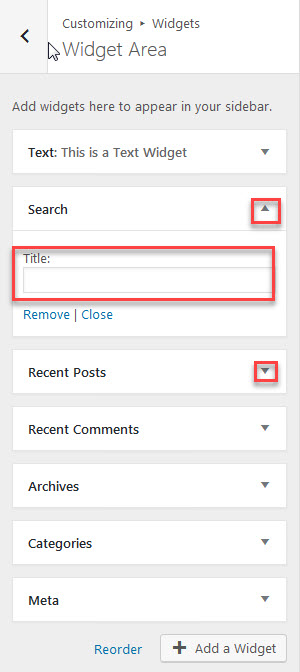
Widgets
A widget is a small block that appears across your site and displays information. You can add these widgets in sidebars the area on your site. It is a great way to customize your sidebars. Your theme may come with some default widgets or varying sidebars.
Widgets can be removed, reordered or added as needed. The text widget is particularly powerful as it allows you to add custom text, images, HTML, or embedded content to your site.
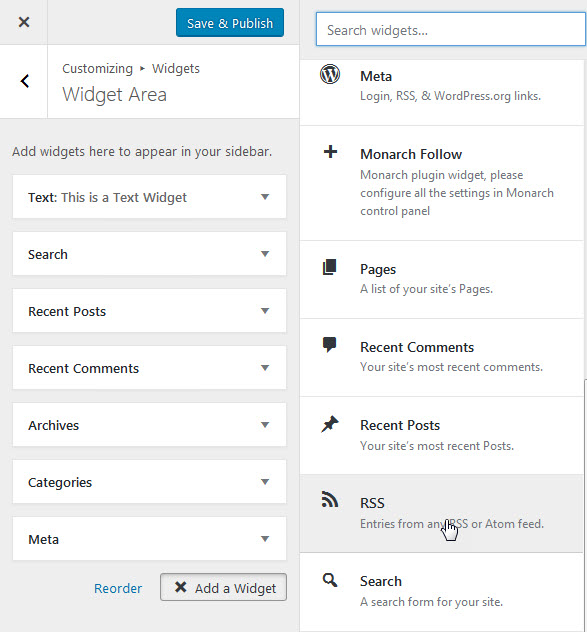
- Click the Widget menu in the Theme Customizer to access to the Widget Customize Screen.
- Click the down arrow of Widget Area to list the already registered Widgets.
- Click Add a Widget button at the bottom of sidebar. It shows the list of available widgets.
- Click a widget you want to add. The widgets should be added in the sidebar.
- Preview your site and you should see the content from your new Widget.
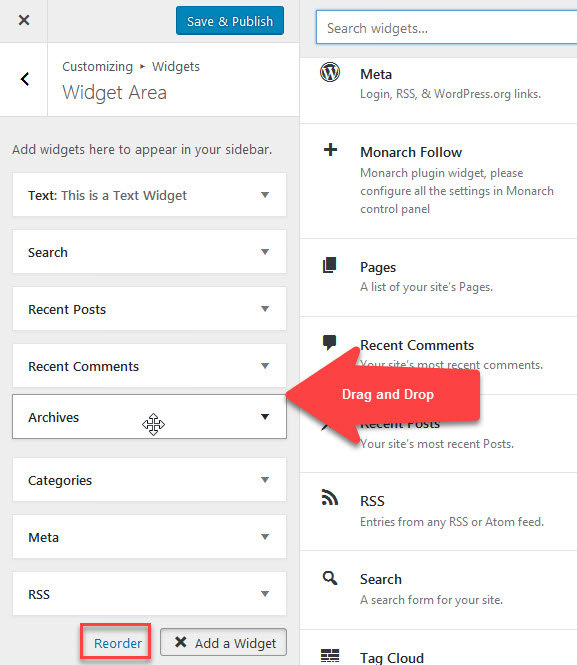
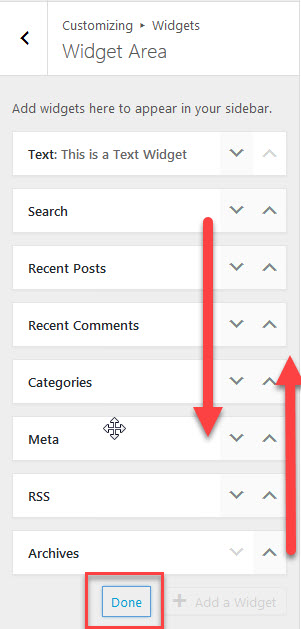
- To arrange the Widgets within the Sidebar, drag and drop the widgets in the order you want or click Reorder link and click up arrow and down allow of each widget and click Done after the arrange operation.
- To customize the Widget features, click the down arrow in the right to expand the Widget's interface.
- To remove the widget, click Remove from Widget's interface in above step.
![]()
OR
HTML Links:
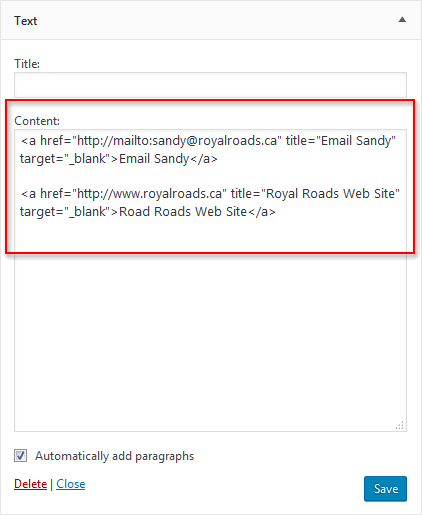
To add your email into a text widget, copy and paste the below code into the widget description (in the Text (HTML) tab) and edit the bolded text with your information:
<a href="http://mailto:sandy@royalroads.ca" title="Email Sandy" target="_blank">Email Sandy</a>
To add a link to a web site, copy and paste the below code into the widget description and edit the bolded text:
<a href="http://www.royalroads.ca" title="Royal Roads Web Site" target="_blank">Road Roads Web Site</a>
Below is what the text widget will look like, click Save to save your changes.
Go to your site and look for the links in the sidebar or footer, this will depend on where you have put your widget. See example below:
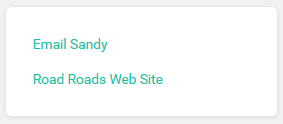
The above links will open in a new browser window.
To link to internal pages on your site and open the page in the same window, remove target="_blank" from the link:
<a href="https://webspace.royalroads.ca/sandy/projects" title="Projects" target="_blank">Projects</a>
becomes
<a href="https://webspace.royalroads.ca/sandy/projects" title="Projects">Projects</a>.
Menus
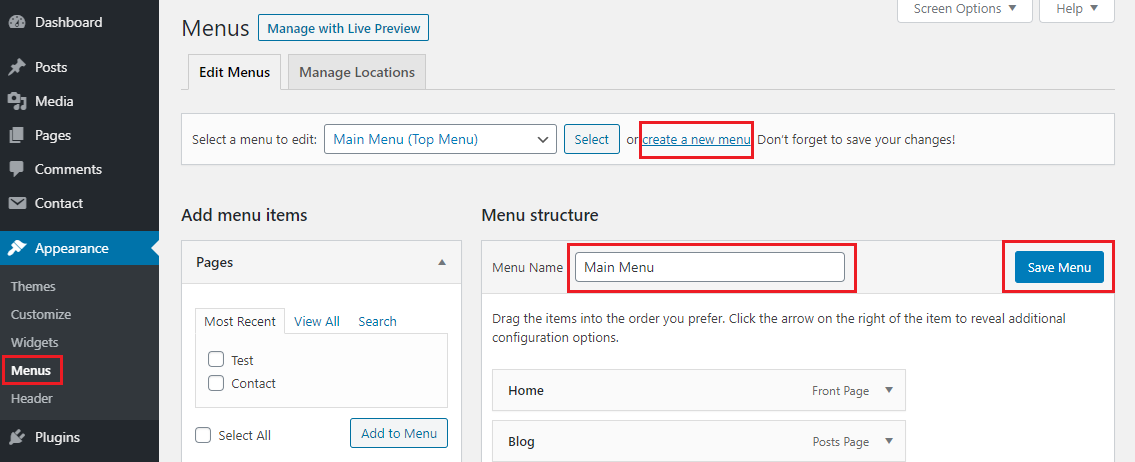
Menus are used to create the navigation on your site. Menus often contain links to pages or posts on your site. It is usually used as the main navigation for your site. When you edit the menu for the first time, do not forget to hit both the ‘Create Menu’ button, then ‘Manage Locations’ to set your menu as the primary menu for the site.
How to create a menu:
- From the 'Appearance' menu on the left-hand side of the Dashboard, select the 'Menus' option to bring up the Menu Editor.
- Select Create a new menu at the top of the page
- Enter a name for your new menu in the Menu Name box
- Click the Save Menu button.
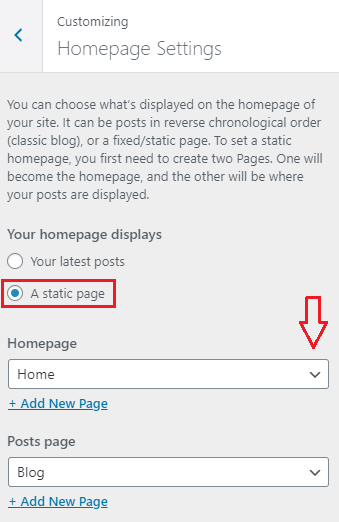
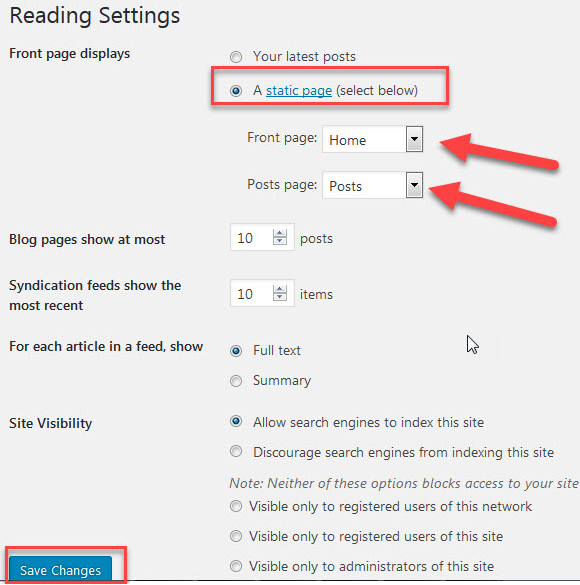
Static Front Page
Your website can have a dynamic blog-like front page, or a static front page which is used to show customized content.
By default, WordPress uses the first option by showing your most recent posts on the front page. Some users prefer the second option which is also known as a “splash page” or a “custom home page”.
This feature is particularly useful for websites that want to keep a blog separate from other sections of their website or for users who want to showcase content other than blog posts on the front page of their website. Static front page is basically a traditional static HTML site model with a fixed front page and content placed in Pages, rarely if ever using posts.
You site's home page can either contain your latest posts or display a static page or post.
- Your latest posts - select this to show your latest posts in your home page
- A static page - select either a Front page or Posts page. Refer Creating a Static Front Page for more detail information and available combination.
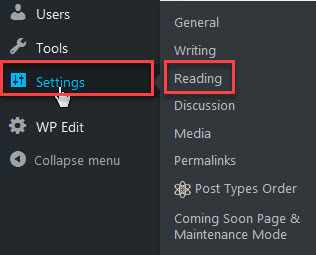
To set up a static page go to Setting>Readings (please note you will have to first create a post and a page)

Content on this page is licensed under a Creative Commons Attribution-ShareAlike 4.0 International license.
Related Articles
Related content
How to Contact the Computer Services Department
Submit a ticket
To submit a ticket, you will be required to log in using your FULL Royal Roads email address (detailed instructions here)
New! If you do not have a full RRU email address (students not currently in a credit program and/or visitors), you can create a portal account using your personal email address.
Email us at IT Customer Service
Contact Form
Phone: 250-391-2659 Toll Free: 1-866-808-5429
Come visit us in the Sequoia Building
Hours of Operation