WebSpace - Creating Content, Pages, And Posts
Topics Covered In This Article
- Pages And Posts
- Compressing Media
- Site Portability
- Free External Hosting
- Categories And Tags
- Featured Images
- Image Gallery
*Please note: we are moving to the WordPress Gutenberg Editor. This article will show how to use the new editor. The WordPress Classic Editor will eventually be retired, the old articles have been saved as PDF files, click here to view.
Pages And Posts
Pages vs Posts
WebSpace uses two fundamental content types: pages and posts. These content types behave quite differently and therefore it is important to understand when to create a page or a post.
Pages are static. They are a good way to publish information that doesn’t change much, like an About or Contact Us page. Pages are usually linked from the main navigation bar on the Homepage.
Posts are dynamic. Posts are always associated with a date and are meant to update your audience. Posts usually show up automatically on your main site page, but this will depend on the theme you've chosen.
Some key differences:
- Posts are:
- displayed in reverse chronological order (placing the most recent content at the top of the page)
- can be assigned tags and categories (helps with search engines!)
- syndicated via RSS
- Pages are:
- not related to categories or tags
- do not appear in RSS feeds
- may have sub-pages (this gives the appearance of a more traditional website)
Video: Posts vs Pages in WordPress
Add A New Post
Posts are designed for more dynamic content such as news and updates.
- From the Dashboard, hover over Posts on the left menu bar and then click the Add New button.
- The Add New Post screen appears.
- Enter a title for the post into the field at the top.
- Enter the body of the post into the text box below.
- When you're finished, click the Publish button on the right.
Video: How to create a WordPress post
Video: How to format a WordPress post
Post formats - you may be able to style posts differently using the Format module on the right hand side. Read about post formats to find out more and view the list of compatible themes.
Add A New Page
Pages are used for static information in WordPress. To access all of your site's pages click on All Pages. From this list you can edit and delete any of your pages. The following steps will guide you through adding pages to your site.
- From the Dashboard, hover over Pages and click the Add New button.
- The Add New Page screen appears.
- Enter a title for the page in the field at the top.
- Enter the body of the page into the text box below.
- When you're finished, click the Publish button on the right.
Video: How to create a WordPress page
Visibility
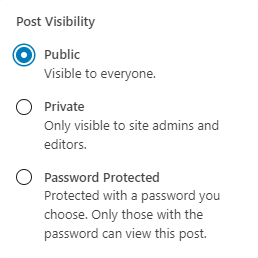
Pages and Posts are public by default, but you can also set them to password protected or private.
- Public: The page is accessible by anyone.
- Password protected: The page is accessible by anyone who enters the correct password.
- Private: Only visible to you and anyone you assign as an Editor or Administrator.
Visibility of pages and posts may be overridden by site-wide visibility settings. For information on site-wide visibility refer to WebSpace - Security And Visibility, Restricting Access To Your WebSpace.
To change the visibility of a post or page navigate to the post or page from the dashboard find the link next to Visibility in the Publish block. The link will reflect the visibility status of your post or page. You can click to change it to another setting, there are three to choose from; Public, Private, or Password Protected.

Select the desired visibility and click the OK button to publish it.
Adding Documents, Images, Audio, Videos, And Links
Media Library
Your WebSpace site includes a media library that allows you to upload many common file formats such as images, word processor, spreadsheet, audio, presentation, and others.
The maximum file size is 15MB and the total maximum space is 500MB.
You are also able to upload video files, but unless you're able to compress them to under 10MB you are better off using a video hosting service such as YouTube.
The following file types are supported: DOC, DOCX, ODT, XLS, XLSX, PPT, PPTX, PPS, PPSX, JPG, PNG, GIF, MPG, MP4, WMV, MP3, OGG, WMA, M4A, WAV, PDF.
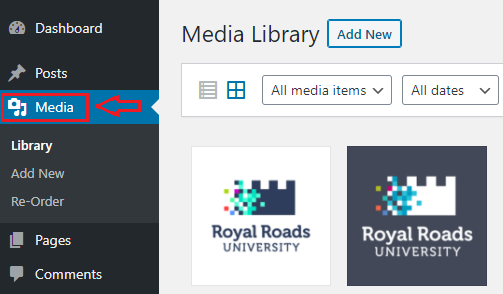
The media library allows you to track all the files you've uploaded, when they were uploaded, and what pages and posts they're attached to.
Access your media library in the dashboard under Media.
Embedding vs Linking
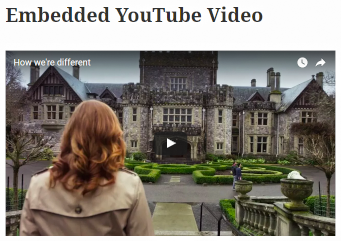
Embedding of media such as an image, video, or audio means that the media is visible directly from the post or page. If it's a playable type of media such as audio or video it will be playable from the post or page.
Here's an example of an embedded video:
Linking means that the media is accessible after clicking on a link. The media is not visible or playable from the page or post. Media is usually linked from text, but can also be linked from an image.
Here's an example of a video that is linked from text:
Royal Roads University video on how RRU is different [YouTube].
Adding Documents
Most common word processor, spreadsheet, and presentation file types can be uploaded to WebSpace including DOC, DOCX, ODT, XLS, XLSX, PPT, PPTX, and PDF.
Click the Inserter+ button then go to Media and choose File, then you can use the Upload or Media Library button choices to find the file you want, or these files can be inserted into pages and posts in your site by using drag and drop into the File block.
Embedding Images
How To Embed An Image
Store the image in your WebSpace media library and embed it in a post or page.
- In your WebSpace site, navigate to the page or post you would like to create or edit.
- Position the cursor where you would like the image to be embedded.
- On the left side of the text editor toolbar, click the Inserter + button.
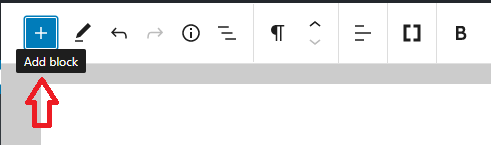
- The Inserter window appears.
- Choose the Image icon under the Media section.
- You should see three choices for locating your image file.
- Once located, click the Upload, Select, or Enter key depending on your choice and the image will appear on the page.
- When you have finished formatting your page, click the Publish button on the right.
Video: How to add images in WordPress
How To Embed An Externally Hosted Image
If you're using Cloudup, simply paste the link to the image into your post or page, and it will automatically be embedded.
If you're using another external that doesn't support automatic embedding such as Dropbox:
- Copy the link of your externally hosted image.
- In your WebSpace site, navigate to the page or post you would like to create or edit.
- On the left side of the text editor toolbar, click the Inserter + button.
- The Inserter window appears.
- Choose the Image icon under the Media section and select the Insert from URL choice
- Paste the image's link into the URL field and hit Enter.
- Add a caption of what the image shows and what information the image is attempting to convey in the Write caption field.
Video: How to add links in WordPress (link to external media)
Embedding Audio
Audio files such as podcasts can be added in the same way that images are added. When prompted with the Inserter+ window, please choose Audio and choose one of the three upload methods. The maximum file size should be sufficient for high-quality audio clips up to about 10 minutes. To ensure that your audience won't have problems listening to your audio clip, the file should be in MP3 format. If it's in another format, you can use this Online Audio Converter to convert it. You can also use the Online Audio Converter to reduce the size of the file.
If your audio file is over the maximum size use one of the external hosting services.
Embedding Video
We recommend the video hosting services YouTube or Vimeo for video embedding.
Once a video is uploaded to YouTube or Vimeo, paste the link to the video into your WebSpace post or page, and it will automatically embed the video. (Note: do not attempt to use the embed code, as this will not work). The Inserter+ window gives you options for embedding content from over 30 different content providers, under the Embed section.
If you are hosting your video on another site such as Dropbox, the video will automatically embed as long as the link ends with a an extension for a common video format such as MP4. For example, pasting in a link from Dropbox with the following format will automatically embed https://dl.dropboxusercontent.com/s/gjw42y7et7b5xfh/Video.mp4.
Uploading A Video To YouTube
If you'd like to upload a video to YouTube and then embed it into your WebSpace site:
- Navigate to YouTube.com and login if necessary. If the video you want to add is already in YouTube, navigate to the video and jump to step 7.
- Click on the Upload button in the top right corner.

- Set the privacy to either Public or Unlisted. Public means that the public can search for your video while unlisted means that the public can not search for your video. If unsure, set it to unlisted, as you can change it later.
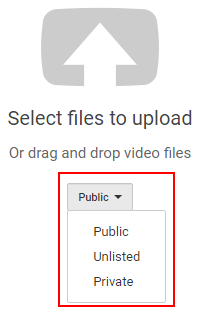
- Drag and drop your video into the Select files to upload window.
- Enter a Title for your video.
- Click the link under Your video will be live at.
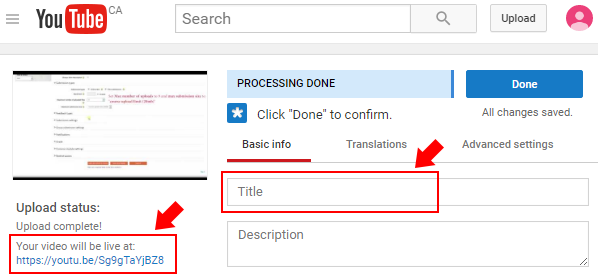
- Copy the URL of the video.

- Click the Inserter+ button on your Webspace site and choose Youtube and paste the URL into the field and click Embed, and it will automatically display the embedded video.
Hosting Videos On WebSpace
If you don't want to use a video hosting service such as YouTube and your video is under 5 minutes long you can likely reduce its size to less than the maximum size while retaining reasonable image and sound quality by using Handbrake.
Quick Steps To Re-encoding A Video With Handbrake:
- Drag and drop the video file onto Handbrake.
- Click the Browse button next to destination and give the output file a name.
- Click the Start button at the top.
- If the file is greater than the maximum size repeat the process but with these settings:
- Under picture tab if if the width is greater than 1024, set it to 1024.
- Under the video tab, set quality to 24 (higher will produce a smaller file).
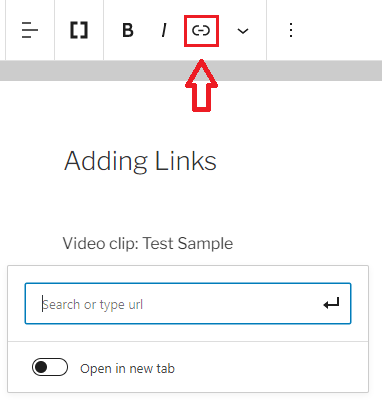
Adding Links
You may link to other pages and posts, or to any media such as images, audio, or video.
To create a link follow these steps:
- Select the text that you would like to link.
- Click the link button in the menu bar.
- Paste the link into the field and click the Enter button.
Video: Adding links in WordPress
Compressing Media
If you have a file that is too large for upload you may be able to compress it to reduce the file size:
Site Portability
Portability is how easy it will be for you to transition your WebSpace site content to another WordPress host. If you're interested in moving your WebSpace site to another WordPress host in the future, possible after you graduate, then you're going to be concerned with portability.
Hosting all audio and video files externally will help improve portability.
Free External Hosting
There are many sites that offer free hosting of media that you can use with your WebSpace site. Dropbox is highlighted here since it can host most common file types. Other external hosting sites that you already use may also work.
From WordPress.org, here is a list of sites that you can embed from. Once uploaded, copy and paste your media's url into a page on your WebSpace and it should automatically embed the media and show the video player or audio player, etc. Update to save it.
How To Host Your Files Using Dropbox
These instructions assume that you have a Dropbox account, and will show how to add a file to your Dropbox account and then create a link to that file that can be used to embed content on your WebSpace site.
- Navigate to Dropbox. Login if needed.
- You'll likely want to create a folder to put your WebSpace content into. If so, click the New folder button at the top and give the folder a name. Navigate to the new folder by clicking on it.
- Drag and drop the file you wish to upload into Dropbox.
- Once the file is uploaded, click the Share button to the right of it.
- Click Create a link.
- Click Copy link.
- Paste the link into a text editor.
- Within the link:
- Replace www.dropbox.com with dl.dropboxusercontent.com.
- Remove ?dl=0 from the end of the link.
- Copy the new link.
- Paste the link you created into your WebSpace site. If it's an image, audio, or video it should automatically embed once you paste in the link.
How To Host Your Files Using Cloudup
Please note: CloudUp now says "Invite only. Public sign ups are currently disabled but you can enter your email if interested."
Cloudup allows you to host documents, images, audio, and video files. The maximum file size is 200MB, and the service allows up to 1000 files.
These instructions assume that you have a Cloudup account.
Drag and drop your file into Cloudup, copy the link from the location bar shown below, and paste the link into your WebSpace post or page.
![]()
Categories And Tags
Categories and tags are indexing systems for your site. Categories are typically used to index your posts often using general taxonomies. Tags are typically more fine-grained than categories and are often used to link to keywords or details within a posts.
Creating and linking a post to a category
- You will need at least one category already created - Dashboard → Posts → Categories.
- While writing or editing a post, under the Categories section on the right-hand sidebar, click Add New Category
- Enter the category in the form that appears and click Add. You may specify a Parent Category at this point.
- Once you have published your posts it will be linked to this category.
Linking a Tag to your Post
- From the post form enter tag(s) separated by commas. Click Add to add the tag to your post
Video: How to Use Categories And Tags in WordPress
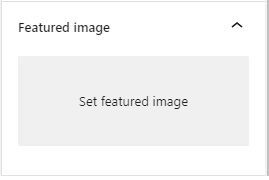
Featured Images
Featured Images are images that are chosen as representative images for posts and pages. The display of these images is up to the theme, but it will often appear at the top of the post or page. This can be especially useful when using a theme that displays a preview gallery of posts or pages along with the featured images.
- While creating or editing a post or page, click the Set featured image button on the right hand side.
- Select an image from your media library or upload a new one, add in alt text, a caption, a description or alter the title at this point if you wish, and then click the Set featured image button at the bottom right.
- How the featured images will look will depend on the theme, but here is an example of the main page of a site that displays the featured images as a gallery of thumbnails:
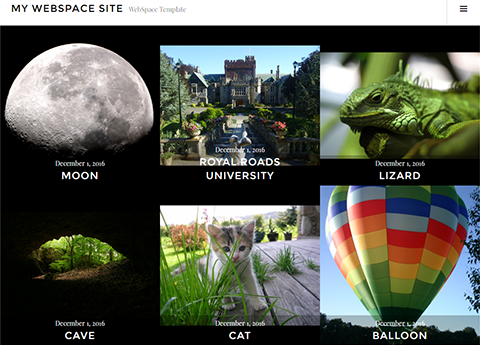
Image Gallery
An Image Gallery will allow you to add a gallery of image thumbnails to your post or page.
- While creating or editing a post or page, click the Inserter + button.
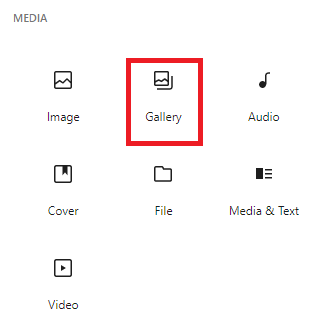
- Click the Gallery menu option.
- Click the Upload or Media Library button, find the image files you want to use and then click the Create a new gallery button.
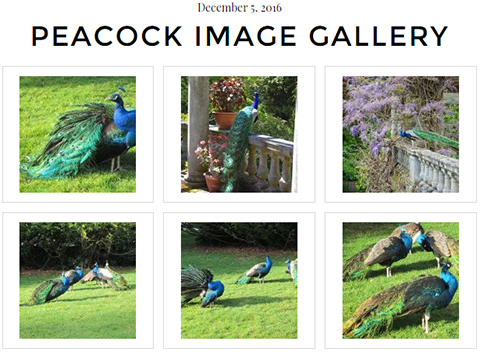
- Selecting six images would result in something that looks like the following. Viewers of your site can click on the image thumbnails to see the full-sized images.

Content on this page is licensed under a Creative Commons Attribution-ShareAlike 4.0 International license.
Related Articles
How to Contact the Computer Services Department
Submit a ticket
To submit a ticket, you will be required to log in using your FULL Royal Roads email address (detailed instructions here)
New! If you do not have a full RRU email address (students not currently in a credit program and/or visitors), you can create a portal account using your personal email address.
Phone: 250-391-2659 Toll Free: 1-866-808-5429
Come visit us in the Sequoia Building
Hours of Operation