/
MALAT WebSpace - Optional Plugins - Super Socializer

MALAT WebSpace - Optional Plugins - Super Socializer

Topics Covered In This Article

Please note: Super Socializer is only available for students who are enrolled in the MALAT program and have a MALAT WebSpace.

Social Media Plugins

There are several ways to add social media to your site. Activate one of these plugins:

Social Follow Icons

  1. Divi Builder plugin - Social Follow Module

Social Share and Follow Icons

  1. Monarch plugin - Documentation, Adding Networks
  2. Super Socializer - see details below.

Super Socializer Instructions

There are many settings for this plugin, adjust settings as needed.

As a place to start, here is an example screenshot of a post and below are steps on how to set this up:

  1. Social Sharing - Floating Interface,
  2. Social Sharing - Standard Interface (will be turning it off below), and
  3. Social Commenting - Facebook Comments enabled


Steps:

  1. Go to your DashboardPlugins → Super Socializer → Activate
  2. In the left side menus, click on Super Socializer, it will expand and open the General Options screen.
  3. Uncheck the popup the notification if you don't want any notifications:


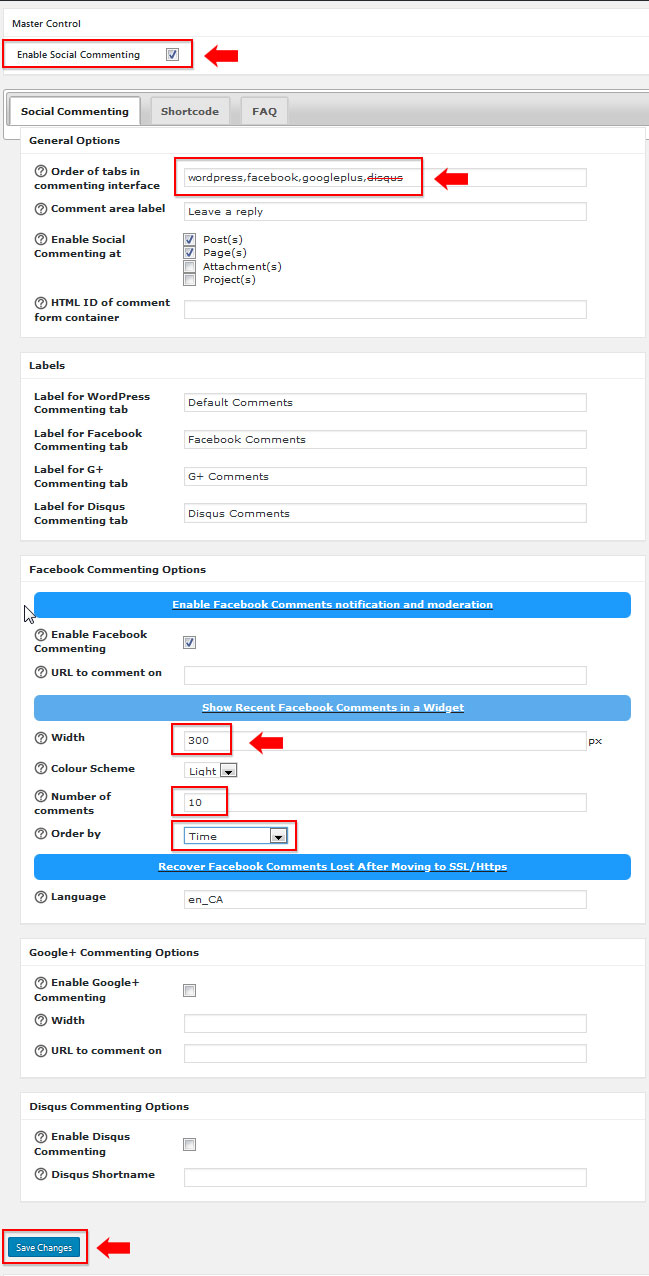
  4. Next, click on Social Commenting in the menu. To enable social commenting, check off the checkbox.

     In this example,
    1. disqus was deleted from the tabs in the comments area of the post.
    2. the Facebook Comments widget was set to:
      1. Width = 300 pixels,
      2. Number of comments = 10,
      3. Order by = Time
    3. Save.


  5. Next in the men is Social Login. Do not need to enable. Leave unchecked.


  6. Next in the menu is Social Sharing.
    1. Check the checkbox to enable social sharing.
    2. The Theme Selection tab will become visible. Icons can be changed for both Standard and Floating Interfaces. In this example, the icon sizes were change to 30 pixels.
    3. Save.


    4. Standard Interface tab:

      1. If you only want to use the Floating interface on posts or pages. Uncheck the box to turn off the Standard interface.


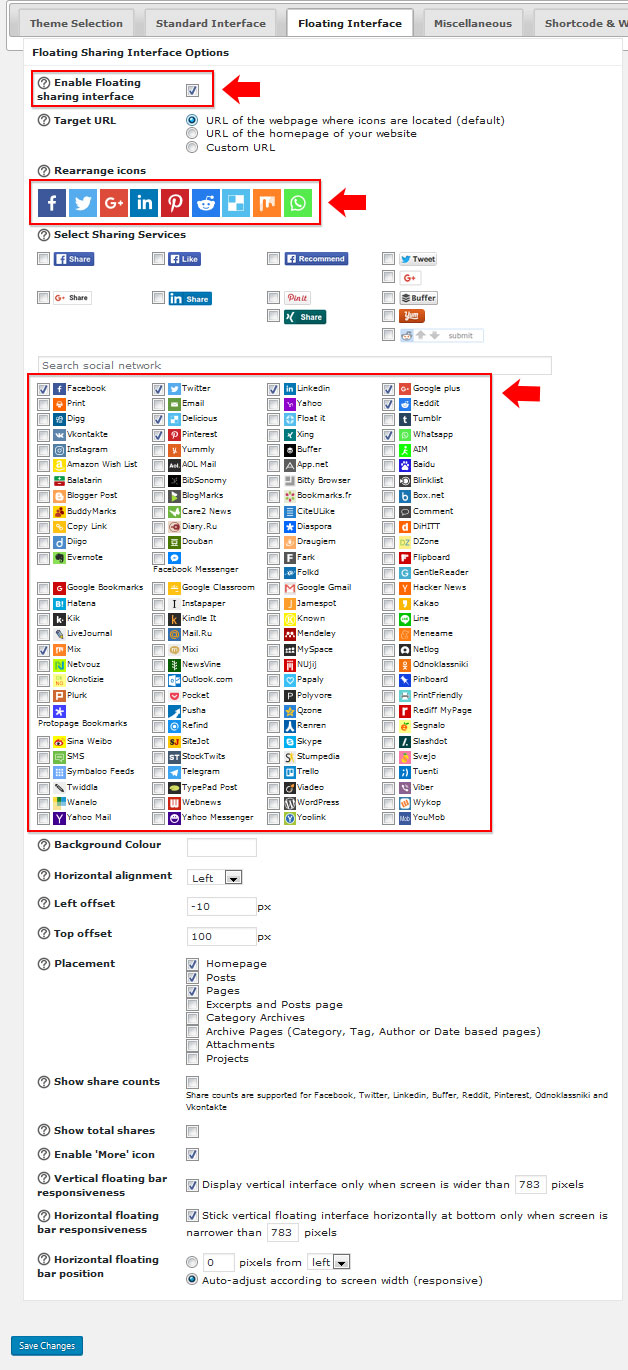
    5. Floating Interface tab:

      1. Check off the checkbox to enable the floating sharing interface
      2. Rearrange icons - drag and drop the order of icons
      3. Select sharing services - check the boxes to select the networks you want
      4. Save.


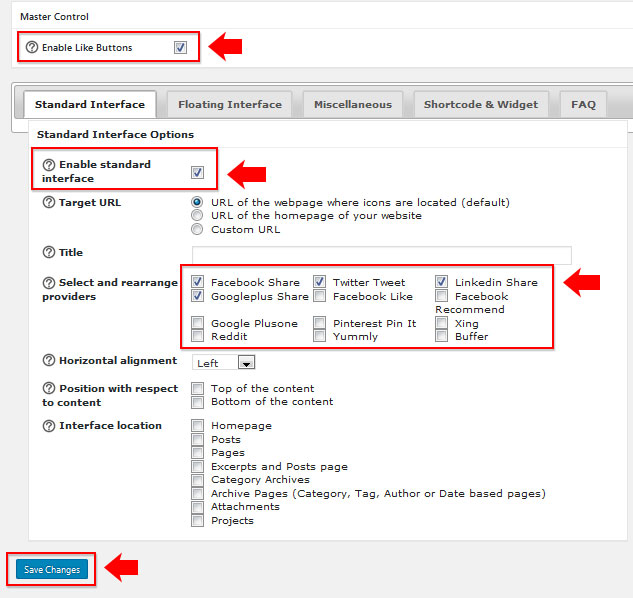
  7. Last in the menu is Like Buttons.

    1. Check off the checkbox to enable the like buttons.
    2. Select and rearrange providers - Check off the ones you want.
    3. Save.


  8. Go to a published post or page to see where your social media icons appear.


Content on this page is licensed under a Creative Commons Attribution-ShareAlike 4.0 International license.

How to Contact the Computer Services Department


Submit a ticket
To submit a ticket, you will be required to log in using your FULL Royal Roads email address (detailed instructions here)
New! If you do not have a full RRU email address (students not currently in a credit program and/or visitors), you can create a portal account using your personal email address.
Email us at IT Customer Service
Contact Form
Phone: 250-391-2659 Toll Free: 1-866-808-5429
Come visit us in the Sequoia Building
Hours of Operation