- Created by Former user , last modified by Jason 1keddie on Oct 13, 2016
You are viewing an old version of this content. View the current version.
Compare with Current View Version History
« Previous Version 28 Next »
Items covered in this article:
Editing content
The Editing function within Moodle allows you to edit content and organize the units and activities within your course. To change or update your course you need to be in editing mode, which means you have to turn editing on.
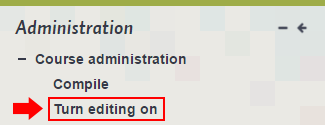
Enter editing mode by either clicking the  button located in the upper right part of the screen, or click on Turn editing on under course administration in the Administration block on the left.
Edit Options
Once you have turned editing on, existing resources and activities display a dropdown menu with the following options:
|
|
Edit title

Clicking on the icon next to an activity or resource title allows you to edit the title without opening edit settings.
Question marks
![]() As you navigate around Moodle you will find question marks next to settings and other tools. Click on the question mark to find out more information about the setting or tool.
As you navigate around Moodle you will find question marks next to settings and other tools. Click on the question mark to find out more information about the setting or tool.
Add an activity or resource

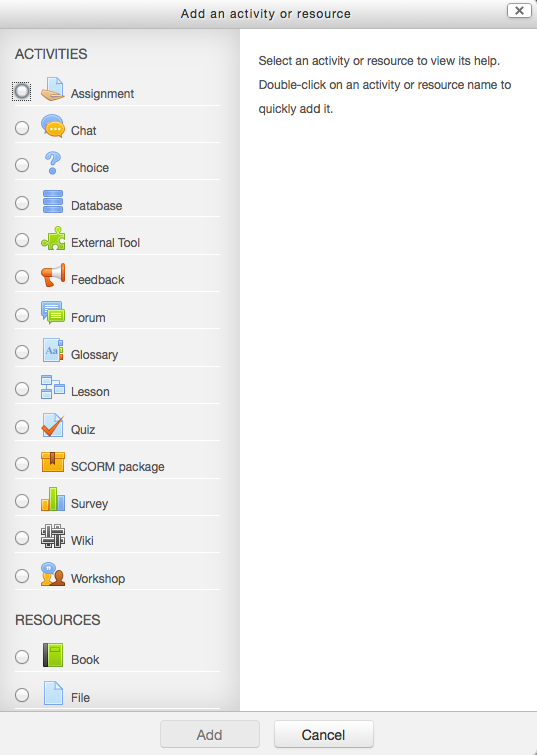
Clicking add an activity or resource opens this menu. To see a description of an activity or resource, click on the radio button next to the activity or resource. Click Add at the bottom of the menu when you are ready to add the selected activity or resource to your course.
Note: Whenever you add a resource or activity to a section, it will appear at the bottom of the section block. To move it, grab the move icon ![]() next to the item and move it to a new location in the course.
next to the item and move it to a new location in the course.
Text editor
The text editor has many icons to assist the user in entering content. Many of these icons and functions should be familiar to you if you use a word processor. Some examples of where you will see the text editor include: editing any resource, activity or unit heading, when you post to a forum or chat, etc.
Collapsing and expanding the editor
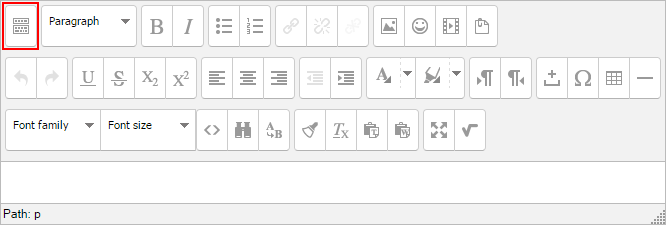
The editor first appears with just one row of buttons. Clicking the icon top left will expand it to three rows.
Collapsed view:

Expanded view:
Toolbar buttons
For those who are not familiar with the tool bar, here are the buttons as grouped in their rows.
Row 1

| 1. Expand | 2. Formatting | 3. Bold | 4. Italic |
| 5. Bulleted list | 6. Numbered list | 7. Add link | 8. Unlink |
| 9. Stop auto linking | 10. Add image | 11. Add emoticon | 12. Add media |
| 13. Manage embedded files |
Row 2

| 1. Undo | 2. Redo | 3. Underline | 4. Strikethrough |
| 5. Subscript | 6. Superscript | 7. Align left | 8. Align centre |
| 9. Align right | 10. Decrease indent | 11. Increase indent | 12. Text colour |
| 13. Background colour | 14. Left to Right | 15. Right to Left |
Row 3

| 1. Font family | 2. Font size | 3. Edit HTML | 4. Find |
| 5. Find/replace | 6. Insert non-breaking space | 7. Insert special character | 8. Insert table |
| 9. Clean up messy code | 10. Remove formatting | 11. Paste as plain text | 12. Paste from MS Word |
| 13. Toggle full screen |
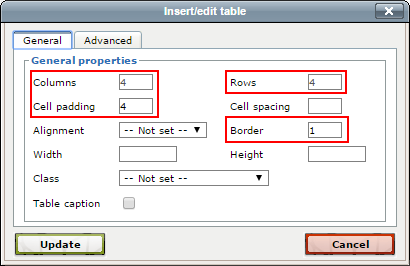
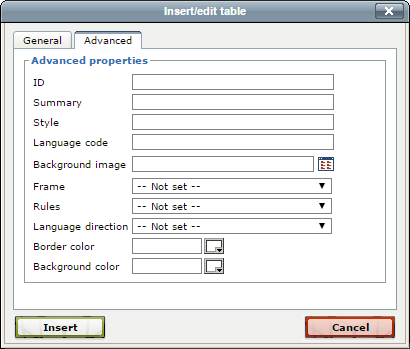
Insert table
General tab:
Advanced tab:
To add borders to a table
Cell borders are crucial for helping readers to follow the rows across the screen. If they aren’t showing already you can add them as follows:
- In the page containing your table, click its Edit tab
- Carefully select all the cells of the table
- Then right click (Macs: Command+click or Ctrl+Click) over any part of your selection to get a context menu; from it select Cell > Table Cell Properties; the cell properties dialog box then loads.
- Click on its Advanced tab, set Border Colour to black (for instance), then click Apply, and then click Update.
- Click Save; the page containing your table will then load displaying its borders.
Upload file using drag & drop, file picker
Quick guide to uploading files
When you want to upload a file to a folder or upload a feedback file to an assignment or add an attachment to a forum post you have the option to use drag and drop or the File picker. On mobile devices, the only option is Choose. Usually the file is copied into Moodle from wherever you have chosen it (e.g., a repository or your computer).
For example, here is is what it looks like when you want to add a file to a folder.
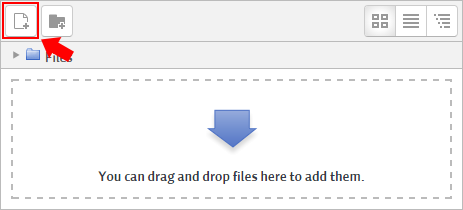
If the file is accessible from your desktop, you can simply drag and drop it into the rectangular box. Then click save and display or save and return to course.
If you do not want to drag and drop a file you can open the File picker by clicking on the Add icon.
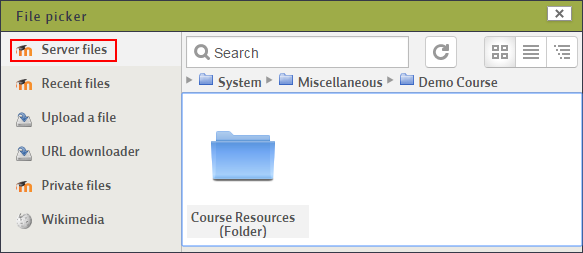
After clicking the Add button the File picker screen appears. There are a number of links listed down the side. These are links to Repositories that hold files you may want to use. The most common repositories in use are Server files and Private files, but there could be additional repositories depending on where in the course you are accessing the File picker. There is also an Upload a file link, which you would click on to upload a file located on your computer.
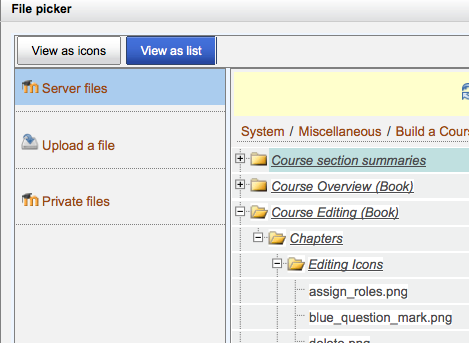
Server files: This takes you to other areas of Moodle where files have been uploaded and to which you have access. You will only see files and folders for the courses you have permission to access. To view a file, drill down through the file directory. When you are in your course and add a file, that file is added to the Server files repository.
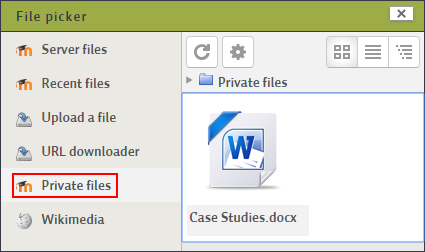
Private files: This is a private file storage area for each user. You can upload files to your private files area from a link in your profile. You can then access those files from the Private files link in the File picker to use in your course. So you can add frequently used files to your Private files and then use them in more than one course in Moodle.
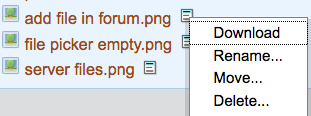
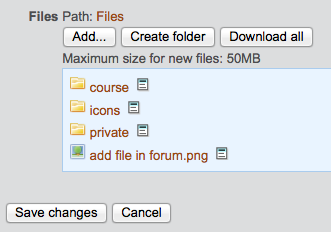
Click on Manage my private files if you want to add, download, rename, move or delete a file.
After clicking Manage my private files you can hover the pointer over the file and choose an action from the menu.
Upload a file: This is where you click to upload files and folders from your computer. Browse to choose a file from your computer, then click Upload this file.

Once you have uploaded the file you still have to save it...so make sure you click on Save changes at the bottom of the window. If you have deleted a file, you must click Save changes to make the deletion permanent.
The File picker has two views for locating uploaded files: icons or list.
| View as icon....This shows the files with their names as text: | View as list....This shows the files as icons with the name below: |
 |
Editing or updating uploaded files: Clicking the name of an uploaded file opens a pop window that allows file details to be altered.

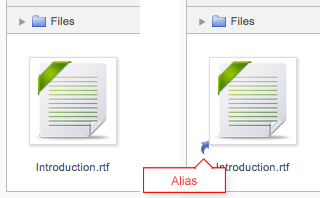
Creating an alias/shortcut: When an uploaded file (or a file from the Private files or other installed repository) is re-used elsewhere on Moodle, you have the option to make a copy (a new, unconnected version) or to create a shortcut or alias. If an alias is created, then when the original file is updated, it will change in all instances of the alias. So you might add a file called "course notes" to your private files, for example, and then add the file into a number of courses. When you make a change in the "course notes" file in your private files, this change will be reflected in all instances of the course notes.

An alias can be recognised by its thumbnail. See the difference in the screenshot below between the original file (left) and the alias (right):
NOTE: Before you add images or other media files to Moodle contact your instructional designer for advice. In some cases files should be uploaded to RRU's media server instead of Moodle. File size limits: 20MB per file.
Organizing the sections
In Edit mode, you can re-arrange the sequence of your course, resources and activities by using the move icon next to each item.
To begin, you need to be in Edit mode. Click Turn editing on.
![]()
Move an Activity or Resource within a section or to a new course section
![]()
Use the move tool to shift the activity or resource up or down within this section or to a different section in the course.
Move your mouse pointer over the move icon next to the item you want to move, the pointer changes into the move icon which you can use to drag the item to a new location.
Working with sections
Activities and resources are located in sections in your course. Course sections can be moved within the course...and when you move a section all of the content within it moves to the new location. Each course section has a default title, Unit 1, Unit 2, etc.; these titles can be renamed using the edit summary icon below the section name. The name of the section appears in the Course menu in the Navigation block. When you move a section, the name changes to match the new destination. For example, if you move Unit 4 above Unit 2, Unit 4 will now be called Unit 2, Unit 2 becomes Unit 3, and Unit 3 becomes Unit 4, etc. Note: if you have renamed a section, the title will not change if it is moved to a new location in the course.
![]()
Sections can be hidden from view or highlighted using the icons to the far right of the section title.
![]()
Related articles
-
Page:
-
Page:
-
Page:
-
Page:
-
Page:
Still need help?
- No labels
