Moodle - Assignment Grading With Marking Workflow (staff/faculty)
Moodle marking workflow, a feature of the assignment activity, enables you to add grades and feedback to student submissions and release (show) the grades and feedback to students at the same time. If using the 'upload multiple feedback files in a zip' feature, it will also prevent students from receiving notifications when the feedback files are uploaded. Use marking workflow if you are marking assignments over several days and would like all students to see their grades/feedback at the same time.
Marking workflow does a lot more than allow the release of grades/feedback at the same time, but these instructions will only cover these aspects of marking workflow. For more information on the additional capabilities of marking workflow, refer to the official Moodle documentation.
The main steps to using marking workflow are:
- Enable marking workflow in the assignment activity (if it's not already)
- Set the marking workflow state to In marking, which will prevent students from seeing any grades or feedback added to submissions.
- Grade submissions and provide feedback as usual
- Set marking workflow state to released, which will make the grades and feedback available to students
Note that setting marking workflow to In marking will hide grades and feedback even if marking workflow was already set to released.
Watch the following quick video or continue on to the main instructions
Steps
1. Enable marking workflow in the assignment activity
Watch the following video (no audio) or skip to the steps below: (recommend watching full screen)
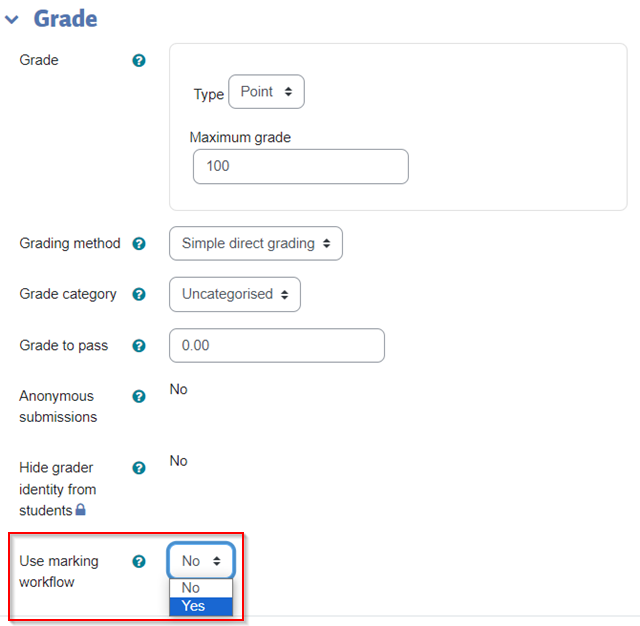
To use marking workflow, you must first enable it. Go into edit settings for the assignment, expand Grade, and set Use marking workflow to Yes and select one the save buttons at the bottom.
After enabling marking workflow, it will be available as an option on the page with the grading table.
2. Set the marking workflow state to In marking
Watch the following video (no audio) or skip to the steps below:
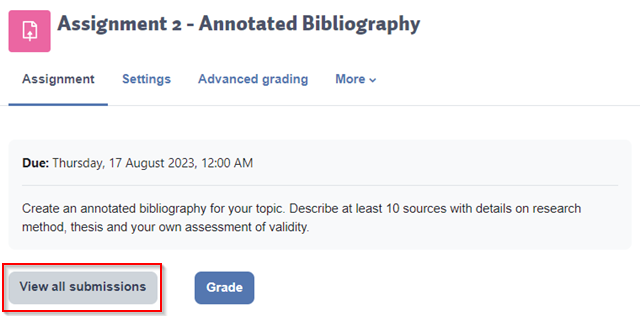
Navigate to the assignment activity and select the View all submissions button to view the grading table for the assignment.
Here's how to select all students and set the marking workflow for all students, but you can also select only individual students.
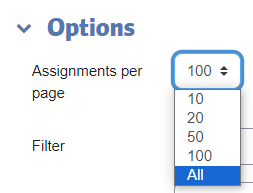
Below the grade table, set Assignments per page to All to show all students in the grade table.
If you are grading in a multi-section/multi-cohort course and there are other instructors grading their own cohorts (or groups), you'll need to select your cohort. It's very important that you only activate marking workflow for your own students. In the example screenshot below, the instructor is grading 'Cohort 1' while another instructor is grading 'Cohort 2'. If the course is not multi-cohort the 'Separate groups' option shown below will not appear, so you won't need to make a choice here.
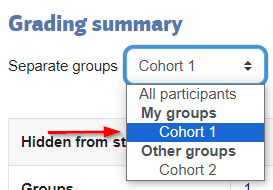
Once you've selected your cohort or determined that your course doesn't have multi-cohorts (most do not), continue on.
As shown below, select the Select all box at the top left of the grade table to select all students currently displayed in the table.
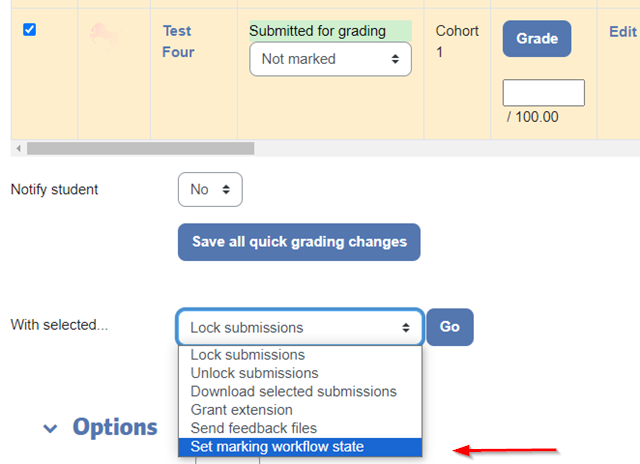
Once you've selected students, scroll down to below the grade table, set With selected to Set marking workflow state and select the Go button.
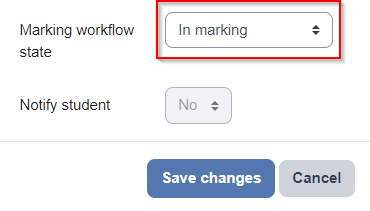
Next, set the Marking workflow state to In marking and select the Save changes button.
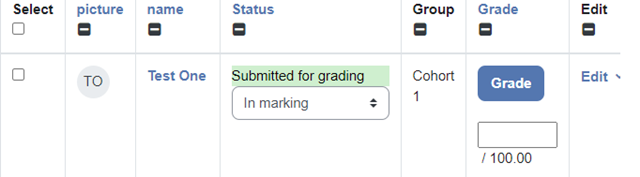
You'll see the status of the selected students change to In marking. When marking workflow is set to In marking students will not be able to see their assignment grade or feedback.
3. Grade submissions and provide feedback as usual
Grade student submissions, providing grades and feedback.
Instructions on Moodle assignment grading may be found here, and if you're new to grading in Moodle then start with the 'online grading' grading workflow.
Once you've finished grading the assignment, continue on with step 4 below to release (show) the grades to the students.
4. Set marking workflow state to released
Watch the following video (no audio) or skip to the steps below:
Once you're ready to release (show) the grades and feedback to students, return to the assignment grade table (navigate to the assignment and select View all submissions).
If you are grading in a multi-section/multi-cohort course and there are other instructors grading their own cohorts (or groups), you'll need to select your cohort. It's very important that you only activate marking workflow for your own students. In the example screenshot below, the instructor is grading 'Cohort A' while another instructor is grading 'Cohort B'. If the course is not multi-cohort the 'Separate groups' option shown below will not appear, so you won't need to make a choice here.
Once you've selected your cohort or determined that your course doesn't have multi-cohorts (most do not), select the students you wish to release the grades for. This usually means selecting the Select all checkbox in the top left corner to select all students. Once the students are selected, scroll to the bottom and under the grading table select Set marking workflow state again, and select the Go button.
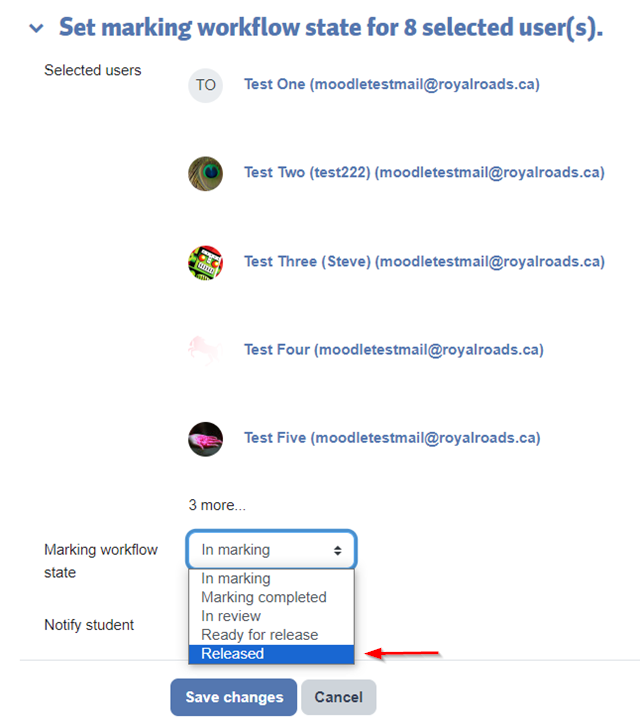
Set the Marking workflow state to Released and select the Save changes button.
Once marking workflow is set to Released, the students will be able to see their grades and feedback for the assignment.
How to Contact the Computer Services Department
Submit a ticket
To submit a ticket, you will be required to log in using your FULL Royal Roads email address (detailed instructions here)
New! If you do not have a full RRU email address (students not currently in a credit program and/or visitors), you can create a portal account using your personal email address.
Email us at IT Customer Service
Contact Form
Phone: 250-391-2659 Toll Free: 1-866-808-5429
Come visit us in the Sequoia Building
Hours of Operation