Topics Covered In This Article
- Moodle My Media - How to create a narrated presentation (using CaptureSpace)
- How to create a narrated presentation
- How to embed the presentation
- Moodle My Media - How to create a narrated presentation (using CaptureSpace)
...
CaptureSpace will record your narration of the slides and combine the narration with the slides. The narrated presentation can be uploaded directly to My Media in Moodle where it can be easily embedded
| Table of Contents | ||
|---|---|---|
|
Introduction
A narrated presentation is a recording of a presentation (e.g. a PowerPoint presentation) with voice-over at the same time. You can also record yourself speaking so the viewer sees your slides and you delivering the presentation. Narrated presentations may be useful for recording lectures, student presentations, etc.
You can record a narrated presentation directly from your My Media page. To do this, you will need to install the My Media application called Kaltura Capture. Once you have made your recording, you can upload to your My Media library and embed it anywhere the Moodle text editor is available.
PowerPoint (Your presentation slides (i.e. PowerPoint in .PPTX or .PPT format) slides need to be prepared in advance.
Narrated presentations created using CaptureSpace cannot be downloaded.
...
- From Moodle, click on the User menu in the top right and click My Media.
...
To learn how to make a narrated presentation, watch this video or read step-by-step instructions (below).
| Iframe | ||||||||
|---|---|---|---|---|---|---|---|---|
|
How to create a narrated presentation
1. Open Kaltura Capture
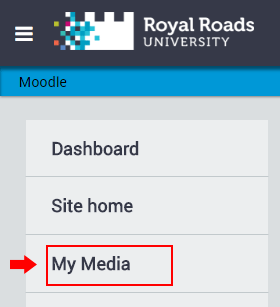
- Log into Moodle, click on My Media in the top navigation bar to view your media library:
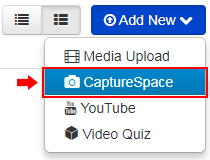
- From the My Media window, click on Add New and then CaptureSpacethen Kaltura Capture.
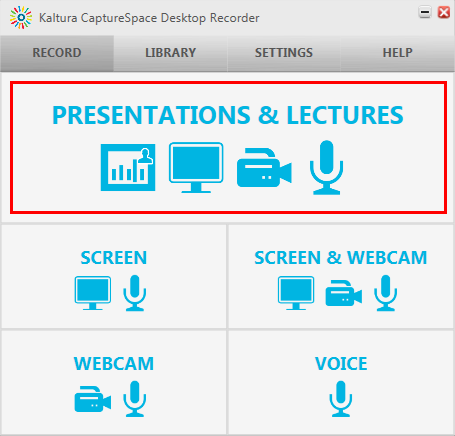
- If you’ve already installed CaptureSpaceKaltura Capture, it will launch automatically. Otherwise, please refer to to Moodle My Media - Installing CaptureSpaceKaltura Capture.With the CaptureSpace Desktop Recorder window open, select Presentations & Lectures.
Presentation recording has many options, but these instructions will suggest basic settings that will allow you to create a narrated presentation. - Set the camera recording options to none (otherwise your webcam will be included in the recording). Browse for and select
3. Select the recording options in the Kaltura Capture desktop recorder
- In the recorder window, decide which options to leave on - you can record the screen (or multiple screens), a webcam and an audio source. In the picture below, the screen and audio are enabled and will be recorded.
- Disable any options by clicking the icon (it will look greyed out with a line across it).
By default, the webcam is turned on, click the camera icon to disable it or leave it on to record yourself while speaking.
For an overview of the recording options, please go to Moodle My Media - Kaltura Capture Keyboard Shortcuts.
3. Look over your settings & click NEW RECORDING to record
To view the settings, click MANAGE to go into the Kaltura Library.
Select the Gear icon and update any settings if needed.
4. Open the presentation file that you wish to use
...
- Click the New Recording button to start recording.
- Click the Start Recording button
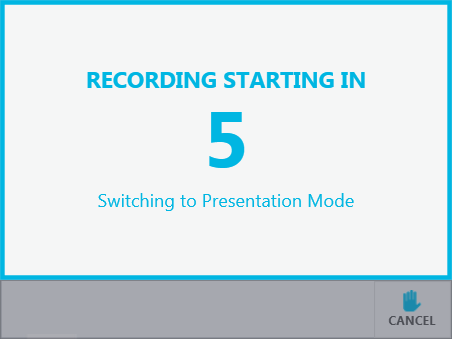
- A 3-second countdown timer will indicate when recording will begin. To ensure that nothing is cut off from the beginning, it is a good idea to wait an extra second before you begin speaking.
Click Pause to pause the recording, click Done when you are finished making your recording, or click cancel if you would like to restart the recording.
- Put the presentation into Slide Show mode (full screen)
4. Record and navigate through your slides
- The slides will automatically be captured as chapters and the text, they will be indexed and searchable later on in the player.
Click the slide to advance to the next slide or use the left and right arrow keys to move back and forth.
5. Annotating your slides
In the recording menu, look for the pencil icon to open the annotation tools.
- Use the annotation tools to draw attention to or highlight the slide’s content.
- Your mouse pointer and the PowerPoint laser pointer will not appear in the recording, use the Cursor arrow in the annotation tools instead.
- When you are done with the annotations, click the Pencil icon again to return to the cursor mode. For more information, go to Kaltura's notes on the annotations tools.
6. Click Stop Recording to finish recording
- Click the square to stop recording.
- The red circle is to temporarily pause. You may also pause or resume the recording by pressing Alt-P.
CTRL+SHIFT+R. - Click the X to cancel and start again.
- It will prompt you to save the recording, select "Yes, stop it".
- Exit presentation:
- If you
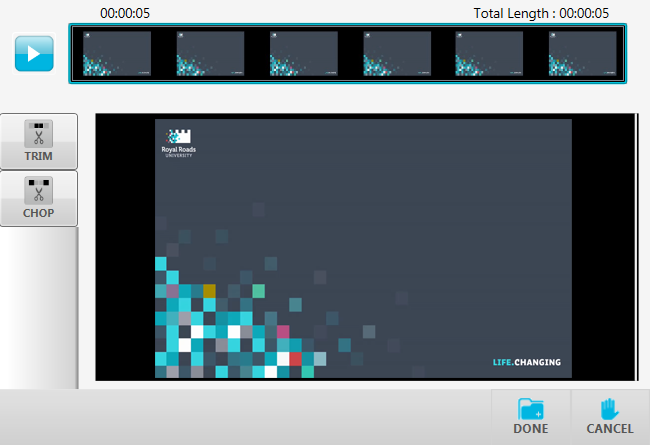
If you do not wish to edit your recording, click Done.
Next, title your recording. Optionally- don't see the recording bar anymore, press ESC key to exit full screen mode and return to the desktop.
- If you have minimized the Kaltura Capture recording bar during your recording it will be in your Tray (PC) or dock (Mac). The tray and dock are the list of icons usually arranged at the bottom of the screen. Look for the Kaltura icon.
7. Name & save your recording
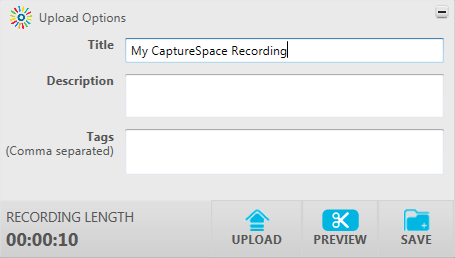
- Give your recording a title in the Title field.
- Optionally, you may add a description and tags.
- Clicking Upload SAVE & UPLOAD will upload the recording to My Media and also save it in the CaptureSpace Kaltura Capture library.
- Clicking Preview will take you back to the editing window.
Clicking Save SAVE will save it in the CaptureSpace library Kaltura Capture library where you can upload later to My Media. - Important Note: DELETE will remove it from your computer. It will not go into your Recycle Bin and can't be retrieved. Make sure you have either uploaded it into My Media or you would like it to be deleted. Deleting it from My Media laterwill also remove it and can't be retrieved.
...
To embed a video in Moodle, please see Moodle My Media - Sharing video & audio.
...
...
You can access the local MP4 video recording files, and here's how:
Open CaptureSpace and click on the Settings tab. Copy the location of the 'Local Media Files Storage' and paste it into the Windows Explorer address bar. From there you'll need to find the correct sub folder with the MP4 file you're looking for.
...
Kaltura Capture keyboard shortcuts
Refer to Moodle My Media - Kaltura Capture Keyboard Shortcuts for handy keyboard shortcuts, including how to record without the Kaltura Capture recorder appearing in your recording.
How to view your recording in My Media
1. Go back to My Media
- After uploading the recording to My Media, go back to Moodle, click on My Media in the left side navigation drawer.
- If you don't see the recording in your My Media library right away, try clicking the refresh button:
2. View the video recording
- Click the title to view the recording.
- The chapters and slides have been automatically added. Click the 3 bars located in the top left corner of the player window to open the panel.
- The panel also includes the Search box. You can search for specific text and it will jump to that specific area of the video.
- To close the panel, click the 3 bars again.
If you have recorded the webcam with your screen, the player will show you multiple interactive viewing options such as Toggle Views Picture-in-Picture, Side-by-Side, and Single View.
Look for the Toggle View options in the top right of the screen to toggle between the presentation and any webcam video.
Kaltura video on how to record a presentation
Iframe allowfullscreen true src https://www.youtube.com/embed/aT9SGmEoaaI width 560 height 315
How to edit your recording
If you'd like to edit your recording please refer to Moodle My Media - How to edit media recordings (Kaltura Capture).
How to embed the recording of your presentation
To embed your narrated presentation in Moodle, please see Moodle My Media - How to upload and share video & audio
Troubleshooting
For information on troubleshooting, please see see Moodle My Media - CaptureSpace troubleshooting.Troubleshooting Kaltura Capture.
| Insert excerpt | ||||||
|---|---|---|---|---|---|---|
|

/kaltura-capture-button.png)
/kaltura-screen.png)
/kaltura-manage.png)
/kaltura-settings.png)
/ppt-desktop-open.jpg)
/kaltura-new-recording.png)
/ppt-desktop-and-kaltura-capture.jpg)
/kaltura-recording-countdown.png)
/kaltura-powerpoint.png)
/fullscreen-presentation.png)
/annotation-pencil.png)
/buttons-explained.png)

/stop-recording.png)
/kaltura-save-and-upload.png)
/mymedia-refresh-button.png)
/ppt-mymedia.png)
/ppt-mymedia-player.png)
/ppt-player-search.png)
/ppt-player-search-close.png)