Moodle My Media - Installing Kaltura Capture

Topics Covered In This Article
Introduction
Introducing Kaltura Capture, the desktop recording application used to record and directly upload your videos and audio into My Media, your media library in Moodle. You can record screencasts, webcams, powerpoint presentation slides, or just audio. To create a new video or audio recording, install the Kaltura Capture desktop recorder to your computer first.
Once you have created and uploaded your media into your My Media library, easily embed it anywhere you see the Moodle text editor. Look for the My Media icon ![]() in the toolbar.
in the toolbar.
To learn how to install Kaltura Capture, watch this video (starts at 1:14 minutes in) or read step-by-step instructions below.
*Note: My Media has changed and is located in the top navigation bar now. It is no longer in the left side navigation drawer. The video will be updated later.
How to install Kaltura Capture
- From Moodle, click on My Media in the top navigation bar to view your media library:

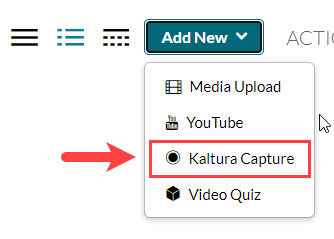
- From the My Media window, click on Add New and then Kaltura Capture.
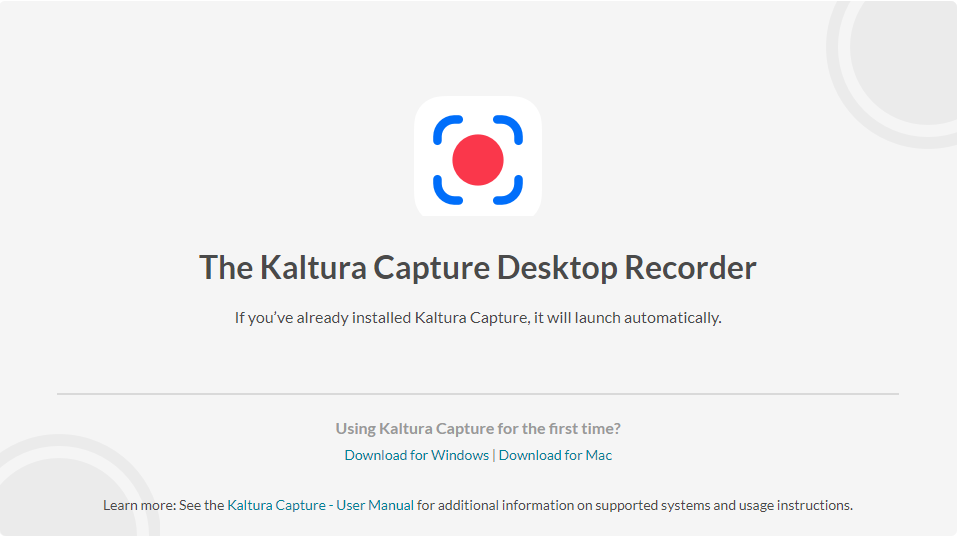
- Click on the Download for Windows or the Download for Mac link to download Kaltura Capture.
- NOTE! If you're using Mac OS Catalina (version 10.15) you will need to give Kaltura Capture permission to use the microphone and webcam. Refer to the troubleshooting section for more info.
- Follow the prompts to install the software to your computer.
After installing:
- It should automatically open, if not reload the My Media page in Moodle, select Add New, and then select Kaltura Capture from the drop down menu.
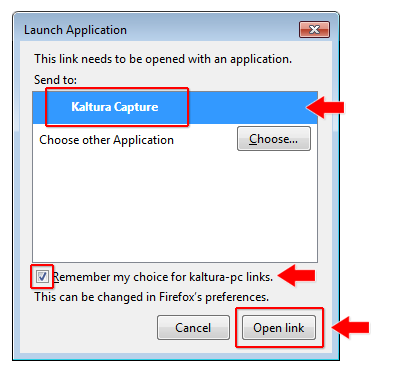
- You may be presented with a confirmation window to open this link in the Kaltura Capture software. The confirmation window will look different depending on your browser:
- In Chrome and Firefox, in the window select Kaltura Capture, tick the Remember my choice check box and click the Open link button.
- In other browsers the options will be similar. Ensure that the software automatically opens.
- In Chrome and Firefox, in the window select Kaltura Capture, tick the Remember my choice check box and click the Open link button.
- This is what the Kaltura Capture desktop recorder will look like:

- Select your recording inputs (screen, camera and/or audio) and press the red button to start recording.
Updating or Re-installing Kaltura Capture
- Kaltura Capture should automatically update. If it does not, uninstall Kaltura Capture then repeat the above steps to download and re-install it. The video below will walk you through all the steps necessary. (Note: if you get an "Error writing to file" during the installation of the newly downloaded version, please cancel the install and reboot, then try it again)
- Important: Kaltura Capture must be launched from Moodle so that it is "connected" to RRU Moodle.
*Note: My Media has changed and is located in the top navigation bar now. It is no longer in the left side navigation drawer. The video will be updated later.
Troubleshooting
- For information on troubleshooting, please see Moodle My Media - Troubleshooting Kaltura Capture and My Media.

Content on this page is licensed under a Creative Commons Attribution-ShareAlike 4.0 International license.
How to Contact the Computer Services Department
Submit a ticket
To submit a ticket, you will be required to log in using your FULL Royal Roads email address (detailed instructions here)
New! If you do not have a full RRU email address (students not currently in a credit program and/or visitors), you can create a portal account using your personal email address.
Phone: 250-391-2659 Toll Free: 1-866-808-5429
Come visit us in the Sequoia Building
Hours of Operation