Moodle - Workshop peer assessment activity step-by-step (staff/faculty)

This document will go through the steps to setup a Moodle Workshop activity and work through the different phases. It's recommended that you read the Moodle Workshop Activity Overview first.
Topics Covered In This Article
Setup Phase
1. From the main course page, turn editing on by clicking on Turn editing on under the gear icon in the top right.
2. Navigate to the section that you would like to add the Workshop, click Add an activity or resource, click Workshop under activities, and click the Add button.
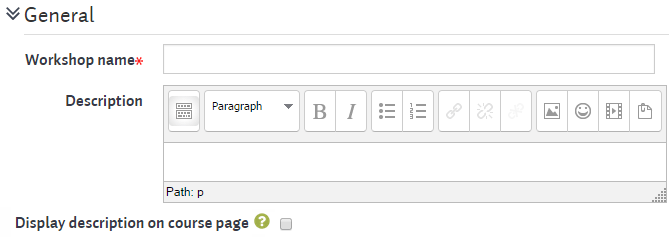
3. General settings
- Add a Workshop name and Description.
- Display description on course page can usually remain unchecked.
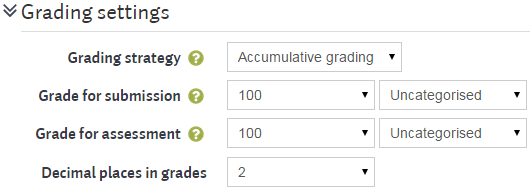
4. Grading settings
- Grading strategy: we will cover Accumulative grading in this document.
- Grade for submission and Grade for assessment: we recommend that these both be set to 100. It is safe to leave Uncategorised as the default.
- NOTE! If the gradebook in your course is set to weighted mean of grades then you will apply a weight to both the submission and assessment portions of this activity in the gradebook. However, if your course is set to simple weighted mean of grades then you will need to set the weight of the submission and assessment here (i.e., do not use 100).
- Decimal places in grades: we recommend that this be set to 2.
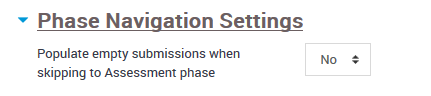
5. Phase navigation settings
- The default setting = No. Students are required to upload a submission before continuing to the assessment phase.
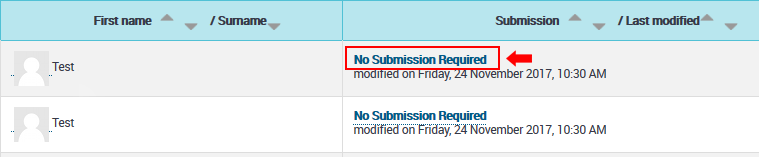
- No submissions required:
- To skip the submission phase and not require any submissions to be uploaded by students, change the Phase navigation settings = Yes.
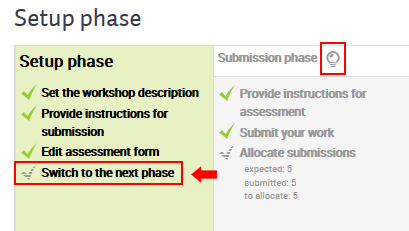
- Once you click switch to the next phase or the light bulb icon in the Submission phase, it will automatically put "No Submission Required" for every student.
Students can now start assessing each other.
6. Submission settings
- Instructions for submission should explain to students any details that might be needed in how assignments are to be submitted. These instructions will appear at the top of the student submission page.
- Maximum number of submission attachments should be set to the maximum number of attachments that students should need to submit. If in doubt, set it to a greater number. If you would like to restrict student submissions to the Submission content window then this can be set to zero.

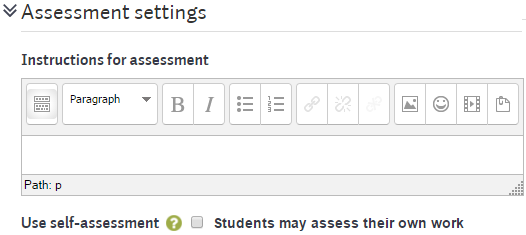
7. Assessment settings
- Add instructions for assessment. These instructions appear at the top of the assessment page.
- Check Use self-assessment if you would like students to self assess (this can be in addition to peer assessment).
8. Feedback
- Overall feedback mode determines whether assessment feedback is Disabled, Optional, or Required.
- Maximum number of overall feedback attachments can usually be left at zero. This will allow participants to enter feedback into the Feedback window only.
- Maximum overall feedback attachment size can usually be left at the default.
- Conclusion text is displayed to participants at the end of the Workshop activity.

9. Example Submissions: This document will not cover the use of example submissions, but keep in mind that you can setup example submissions for students to practice their assessments on before they begin peer assessment.
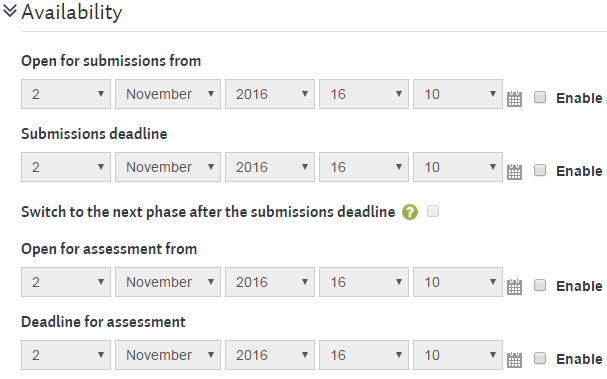
10. Availability
- If you would like to automate when submissions and/or assessments are completed, check the box for Enable and enter in the desired time and date.
- If you would like to automate the transition from Submissions to Assessments then check the box for Switch to the next phase after the submissions deadline.
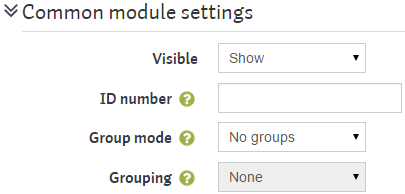
11. Common module settings can usually be set to the settings shown below. These settings will involve all participants in the class as individuals (there will be no grouping).
12. Restrict Access can be left at the defaults.
13. Click the Save and display button at the bottom of the page.

Edit Assessment Form
You should now see the Workshop phases. The Setup phase will be highlighted, as it's the current phase. The Setup phase box will indicate that Edit assessment form still needs to be setup.

1. Click on Edit assessment form in the Setup phase box.
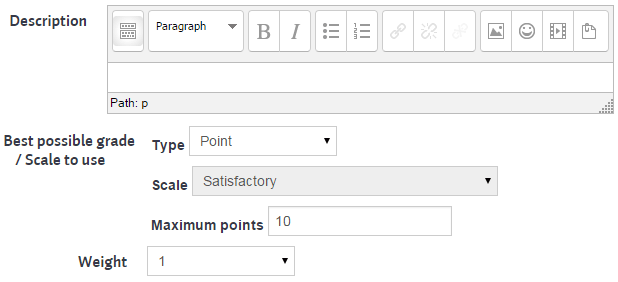
2. Setup of Aspects
- Description: this is a description of the Aspect that is being assessed by students (e.g., grammar, spelling, etc).
- Type: for this example we will leave this set to Point, but you can choose an alternate grade scale.
- Scale: if you chose to use a grading Scale, select the Scale here.
- Maximum Points: leaving this at the default of 10 will allow students to assess this Aspect out of 10 points (0-10).
- NOTE! assignments in RRU graduate courses require 70%+ to pass. It is suggested that the instructions for assessment, mentioned above, and the Aspect Description be carefully written so that student assessments will result in a reasonable number of students passing the assignment (if necessary, you can override grades at the end of the activity).
- Weight: the contribution of each Aspect towards the grade can be weighted. If one Aspect is twice as important as another Aspect then you can double its weighting. As an example, you might think that the grammar in an assignment is twice as important as how good the title is, so you can weight it appropriately.
- Fill out the form for each Aspect that you would like students to assess. If you need more Aspects click the Blanks for 2 more aspects button at the bottom of the page.

- When you're finished filling out the Aspects, click the Save and preview button at the bottom.

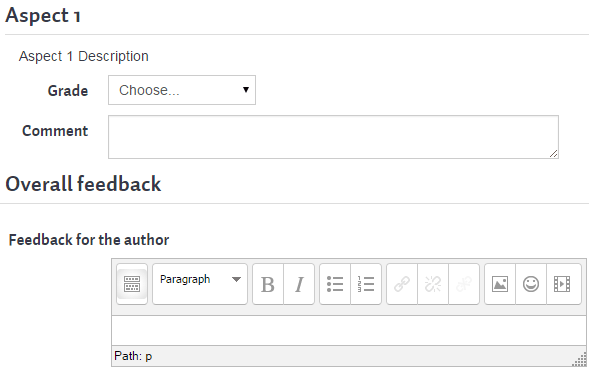
3. Preview the assessment form that students will see. Consider whether the form is appropriate for students and that the Aspect descriptions provide students with enough guidance to assess each Aspect.
4. Click the Back to editing form button to return to the form.

5. If you would like to edit the form then do so and repeat the save-and-preview step. Otherwise, click the Save and close button.

Submission Phase
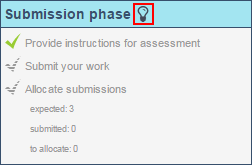
We will manually switch the workshop to the Submission phase by clicking the light bulb in the submission phase box and then click the Continue button to proceed.
Once the Submission phase is active it will turn green. This is when students can submit their assignments for peer assessment.
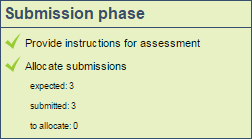
The Submission phase box lists
- the number of expected submissions,
- the number of submitted submissions, and
- how many submissions remain to be allocated.

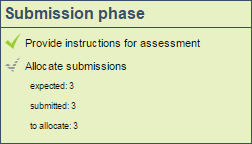
Once participants have submitted their assignments or the due date has passed, we can move on to allocating submissions. The Submission phase box, in this example, shows that three submissions were submitted and that there are three submissions to allocate.
Allocating Submissions
1. Click on Allocate submissions in the Submission phase box.
This will bring you to the Allocation settings. There are three allocation techniques, but we will be using Random allocation in this example.
Random allocation will randomly select participants to assess each submission.
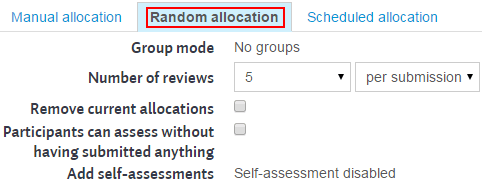
2. Click on the Random allocation tab.
- Group mode displays the current group mode but cannot be changed here.
- Number of reviews is the number of reviews/assessments that each participant's submission will receive. Set this to an appropriate number considering how long it will take to perform each assessment and how many students are in the class.
- Number of reviews can be set to per submission or to per reviewer. If you are accepting multiple submissions you will need to consider which setting is preferred. When there is only one submission this setting will not have any effect.
- The rest of the settings are fine at their defaults for most courses.
3. When you're happy with the allocation settings, click the Save changes button.

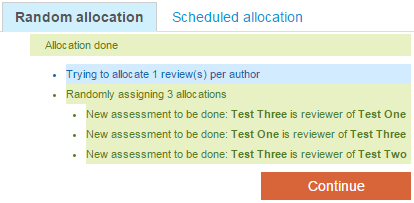
The next screen will list all allocations, including any errors (e.g., an error could result from requesting more reviews than is possible with the number of participants).
4. Click the Continue button to move to the next step.
Now that the assessments have been allocated, the Submission phase shows that there are zero remaining assignments to be allocated.
5. Move on to the next phase by clicking the light bulb on the Assessment phase and click the Continue button to proceed.
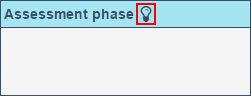
Assessment Phase
Participants will be able to assess the assignment/s they have been allocated using the assessment form that was setup earlier.
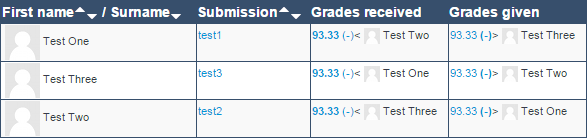
Assessment results are shown in the Workshop grades report that is on the Workshop page.
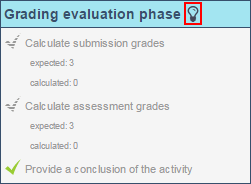
Once all assessments are completed or time has expired for assessments, click on the light bulb for the Grading evaluation phase and click the Continue button.
Grading Evaluation Phase
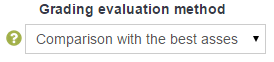
There is currently only one Grading evaluation method, so leave this at the default.
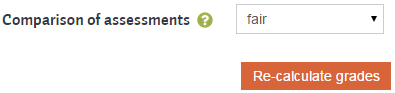
Comparison of assessments will determine how many points other assessments receive based on how far away the assessment is from the average of assessments. Comparison of assessments can range from very lax to very strict. With it set to very strict an assessment may have to be exactly the same as the average assessment to receive maximum points, but with it set to very lax it may still receive maximum points and be significantly different from the average. (Note that this is a simplified explanation and isn't technically accurate from a math perspective)
1. Click the Re-calculate grades button to populate the Workshop grade report. The Re-calculate grades button can be pressed multiple times to see the result of different Comparison of assessments settings.
2. Once you're happy with the grades you can click the light bulb on the Closed phase to close the Workshop. You are always able to return to previous phases, even after moving to the closed phase.
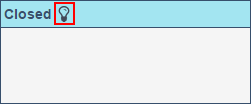
Closed Phase
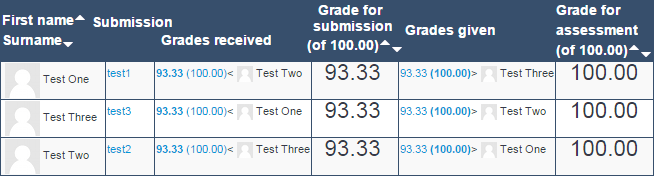
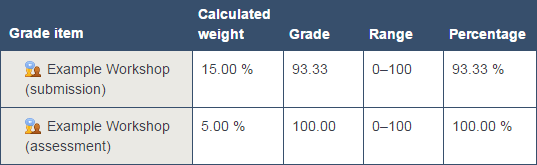
Once transitioned to the closed phase, participants' grades for the Workshop activity for both the submission and the assessment will appear in the gradebook for each participant.
This is an example of the student view of the gradebook:
Permissions in Workshop
How to Add the instructor as a peer reviewer
If needed, the instructor can be added and the grade will be added into the aggregation. The grade can be given more weight if needed.
To edit, go into the workshop, select the gear icon, Permissions.
Search for Peer assess. Click the plus icon and select the Instructor role to allow.

Go back to the workshop, the instructor's name will show up in the Assessment Phase under the Grades Received column.
How to Make Peer Reviews Anonymous
If you do not want your students to know whose work they are reviewing and who is reviewing their work, go into the workshop, select the gear icon, Permissions. Click the X next to student to prevent "view author names" and "view reviewer names".

Content on this page is licensed under a Creative Commons Attribution-ShareAlike 4.0 International license.
How to Contact the Computer Services Department
Submit a ticket
To submit a ticket, you will be required to log in using your FULL Royal Roads email address (detailed instructions here)
New! If you do not have a full RRU email address (students not currently in a credit program and/or visitors), you can create a portal account using your personal email address.
Phone: 250-391-2659 Toll Free: 1-866-808-5429
Come visit us in the Sequoia Building
Hours of Operation