Introduction
Kaltura CaptureSpace allows you to record screencasts, webcams, presentation slides, or just audio. The media can be uploaded directly to Kaltura 'My Media' in Moodle where it can be easily embedded anywhere the text editor is available.
Videos recorded in CaptureSpace can only be uploaded to 'My Media' within Moodle and used within Moodle. You cannot currently download the videos.
How to record video using Kaltura CaptureSpace
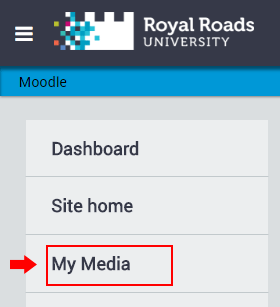
- From Moodle, click on the User menu in the top right and click My Media.
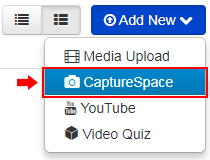
- From the Kaltura My Media window, click on Add New and then CaptureSpace.
If you’ve already installed CaptureSpace, it will launch automatically.
Installing CaptureSpaceIf you haven't installed CaptureSpace, click on the button to download CaptureSpace for your operating system and install the software. After installing: Reload the My Media page in Moodle Click 'Add New' and then 'CaptureSpace' You may be presented with a confirmation window to open this link in the CaptureSpace software. The confirmation window will look different depending on your browser:
The CaptureSpace software should open on your computer. |
|---|
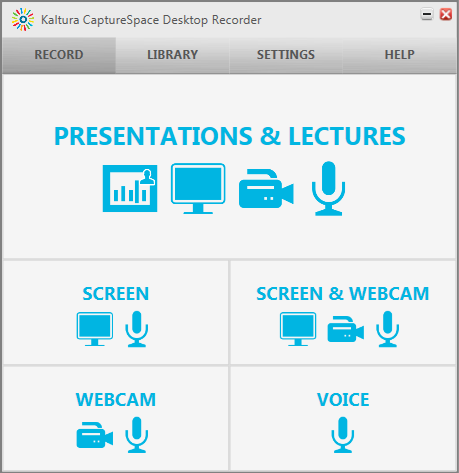
- With the CaptureSpace Desktop Recorder window open, select from the options provided.
- Make the recording.
- When finished recording, click Done.
- If you've selected a recording type that includes a video you'll have the option to perform basic editing of the video before proceeding. Click Done when finished.
- Give the video a title and, optionally, you may also give the video a description tag/s.
- Click Upload.
Short videos will appear in your Kaltura My Media after a few minutes. Longer videos will take longer. You can move on to the next video and come back to it instead of waiting.
How to embed video
To embed a video in Moodle, please see Moodle - Sharing video & audio using Kaltura.
Troubleshooting
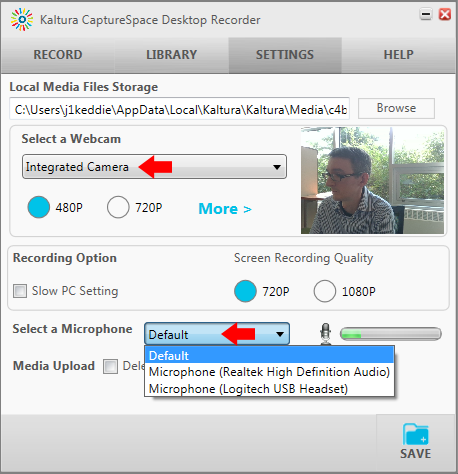
- If you're not getting audio or video, go to the Settings tab in CaptureSpace and ensure that the correct video and audio sources are selected.


