Padlet is excellent for many collaborative activities. These instructions explain how to setup a Padlet and either share the link or embed it.
Steps
Basic Setup
Navigate to padlet.com and login.
Click on the New Padlet button in the top right corner.
Enter in a Title, Description, and select the Layout. The freeform layout allows you to move posts around and usually works best for most activities.
Once you're done, click the Next button.
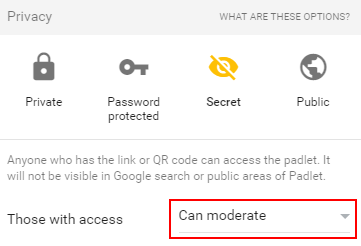
The default sharing options will allow anyone who has a link to the Padlet to write to it, but only you will be able to do things like move and delete posts.
Optional: If you'd like everyone to be able to move, edit, and delete posts, set Those with access to Can moderate.
Once you're happy with the sharing options, click the Next button again and then click the Start Posting button.
Share By Link
Copy the link from your web browser's location bar and share it as needed. Anyone who has this link will have either write or moderator permissions as mentioned above.
Use Embed Code
The embed code allows you to embed the Padlet directly into a website or Moodle site.
Click the Share button in the top right.
Click on the Share/Export/Embed button in the top right.
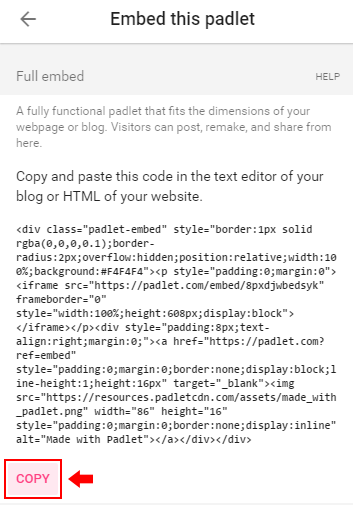
Click on Embed in your blog or your website.
Click on the COPY button underneath the Full embed section.
To embed the Padlet directly into Moodle, follow the steps listed in the article: Moodle - Embedding content using HTML editor.


