Introduction
These instructions explain how to use YouTube to create an SRT caption file, which is an alternative to ordering the captions through My Media. An SRT caption file can be used on other media platforms such as Moodle My Media.
Watch the video demo or continue below to follow the text instructions.
Steps to create SRT file
Upload video to YouTube
Navigate to the captions section of your video in YouTube
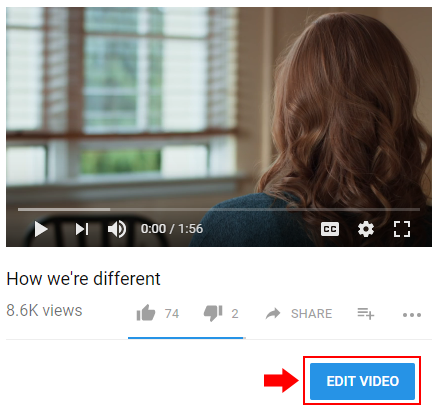
- Navigate to a video in YouTube that is in your YouTube account and ensure that you are logged in.
- Select the Edit Video button under the video.
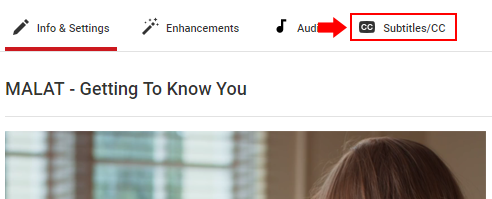
- Select Subtitles/CC tab at the top right.
Edit your captions
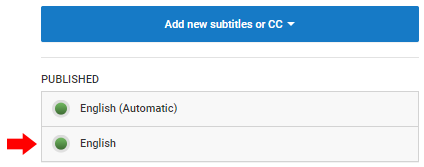
- Click on English (Automatic) to select the automatically generated captions.
If this section is blank you'll need to wait longer for YouTube to process the captions.
- Click on the Edit button in the top right to edit your captions. The automatically generated captions need human editing to fix any errors.
- When you're done editing your captions click the Save changes button.
- Once you've saved changes to the automatically generated captions it will save it as just 'English'.
Download the SRT caption file
- After editing and saving the captions, select the newly saved captions. In this example the edited captions were saved as English.
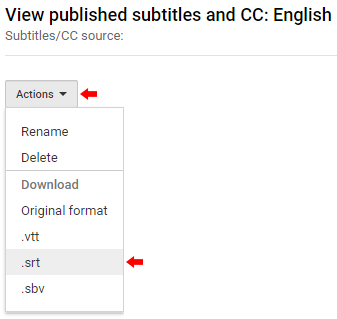
- Select Actions and then '.srt' to download the SRT file.
- Now you should have the SRT file for the video. If you'd like instructions on how to add the SRT file to a video in My Media click here.
- If you'd like to convert the SRT file to a text transcript, you can do this here.
Content on this page is licensed under a Creative Commons Attribution-ShareAlike 4.0 International license.


