This article will show you how to reduce the file size of a PowerPoint presentation file. Reducing the file size may be necessary to upload your file to Moodle or to make the file more easily shared. Smaller file sizes will also help ensure that participants can quickly download and view the presentation.
You will need Microsoft PowerPoint 2013 or newer, or Office 365 PowerPoint to follow along with these instructions.
These instructions show two main steps in compressing a PowerPoint file: (1) compressing video/audio media, and (2) compressing images.
Before compressing a PowerPoint file it's recommended that you make a copy of your original file in case you need to go back to the original and try different compression options. Always save a copy of your original.
If the PowerPoint file does not have any video or audio in it (only text and images) you may want to try saving it as a PDF file first to see how small the file size is. This may be a quick solution to creating a smaller file. In PowerPoint, to save the PowerPoint as a PDF go to File, Save-As, and select PDF. If the PowerPoint does contain audio or audio, you want to keep it as a pptx file, or the PDF isn't small enough then read on.
Compressing all video/audio media in a PowerPoint file
In PowerPoint with the file opened that you want to compress, select the File tab at the top left.

Then select Info just below the top left.

Select the Compress Media button next to Media Size and Performance and select the desired setting. The names of the settings If you don't see this button your PowerPoint likely doesn't have audio or video files in it and you can skip to the section on compressing the images.
The compression options under the Compress Media button will vary depending on the version of PowerPoint, but it's suggested to start with the lowest options first, which is Standard (480p), in this example.

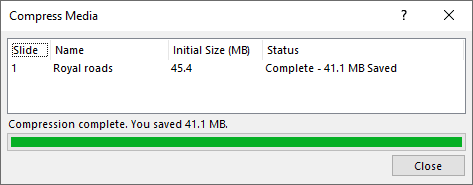
Once you've selected a compression option it will immediately compress all media in the PowerPoint. The Compress Media dialog box will display the initial size of the media and how much size was saved for each media. In the example below the media went from 45.4 MB to 4.3 MB, resulting in a 41.1 MB or 91% savings! Select the Close button to close the Compress Media dialog box.
Now that you've compressed media in the PowerPoint you will want to review the media to ensure that the quality is acceptable. If the decrease in quality is not acceptable return to the Compress Media button shown above and select Undo, and then repeat the process but select a higher quality option. If there are any issues using undo close the PowerPoint and re-open it.
When you're satisfied with the results of the media compression save the PowerPoint (do not overwrite your original, just in case you need to go back to it).
Compressing all images in a PowerPoint file
In PowerPoint with the file opened that you want to compress, select File at the top left and then Options at the bottom left. In the PowerPoint Options dialog that appears select the Advanced tab on the left. Below Image Size and Quality select Discard editing data, unselect Do not compress images in file, and set Default resolution to 96 ppi. Select the OK button at the bottom to return to the PowerPoint.

In the PowerPoint presentation, select an image (any image) and the ribbon at the top should automatically change to the Picture Tools toolbar. In the Picture Tools toolbar select the Format tab(or Picture Format) tab. Next, select the Compress Pictures button that appears around the middle of the image below.


In the Compress Pictures dialog unselect Apply only to this picture, select Delete cropped areas of pictures, and select Use default resolutionsE-mail (96ppi). Select the OK button to process all images in the PowerPoint.


Now that you've compressed the images in the PowerPoint you will want to review the images to ensure that the quality is acceptable. If the decrease in quality is not acceptable you can either use control-z to undo the image compression and repeat this process but use a higher quality resolution. If there are any issues using undo either close the PowerPoint and re-open it or return to the original copy of the document.
When you're satisfied with the results of the image compression save the PowerPoint (do not overwrite your original, just in case you need to go back to it).
Hopefully the PowerPoint has a much smaller file size!
Results
While working through these steps with a sample presentation file the reduction in quality was only slightly noticeable and the file size was reduced by 89%:

| Insert excerpt | ||||||
|---|---|---|---|---|---|---|
|
Related Articles
| Filter by label (Content by label) | ||||||||
|---|---|---|---|---|---|---|---|---|
|