Versions Compared
compared with
Key
- This line was added.
- This line was removed.
- Formatting was changed.
This articles assumes that you have generated an SRT caption file and would like to add it to a video that you have already uploaded to your My Media library.
Introduction
SRT Caption files add captioning to My Media videos. Captioning displays the spoken words in text that appears on the video.
Watch a video demo or continue below to follow the text instructions.
| Widget Connectoriframe | ||||||||
|---|---|---|---|---|---|---|---|---|
|
How to add an SRT caption file using Kaltura Reach
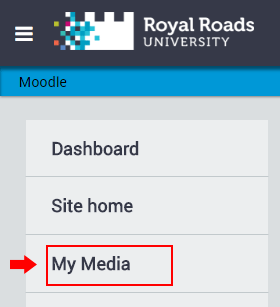
- From Moodle, in the navigation drawer on the left, select My Media.
 Image Modified
 - Next to the video that you would like to add an SRT caption file to, click select the Edit button.
 Image Removed
 Image Added
- Select the Captions tab and then select the Upload captions file button.
 Image Removed
 Image Added
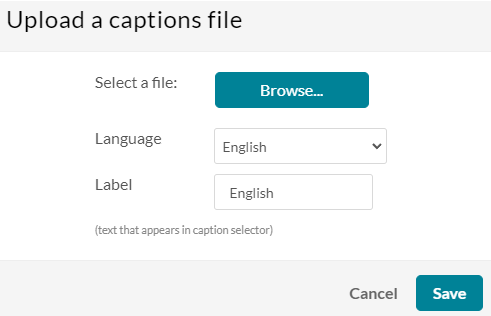
 - Select the Browse button and browse for the captions file.
Select the Language for the file.
If there's an accuracy field you can skip it.
Enter a Label for the language (e.g., "English"), which is what will appear in the caption selector.
Select the Save button Image Removed
 Image Added
 - This video will now display captions anywhere it was and will be embedded.
Insert excerpt Teaching & learning online Teaching & learning online nopanel true
| Filter by label (Content by label) | ||||||||
|---|---|---|---|---|---|---|---|---|
|