Topics covered in this article
...
A screencast is a recording of what is on your computer screen, often containing audio narration. Another name for a screencast is video screen capture or screen recording. Screencasts are useful for how-to-guides, narrated demonstrations, course tours, tutorials, slideshows, etc.
You can record screencasts directly from your My Media page. To do this, you will need to install the My Media application called Kaltura Capture. Once you have made your recording, you can upload to your My Media library and embed it anywhere the Moodle text editor is available.
...
2. Enable the SCREEN input in the Kaltura Capture recorder
- The Kaltura Capture Desktop desktop recorder window (pictured below) will open. With the Kaltura Capture Desktop Recorder window open, check
- Check to see if Screen is enabled, it will look blue. If not, select Screen to record a before recording your screencast.
- If you would like to include your webcam in the corner of your recording check to see if Camera is already enabled or select Camera to turn it on.
...
- If you have multiple screens and you only want to record only one screen, simply click one of the Screen icons until it becomes grey, this will show disable it has been disabled.
- For an overview of the recording options, please go to How to select the recording options (using Kaltura Capture).
3. Click RED RECORD CIRCLE to start recording
- If If you've selected Full Screen click the Record button.
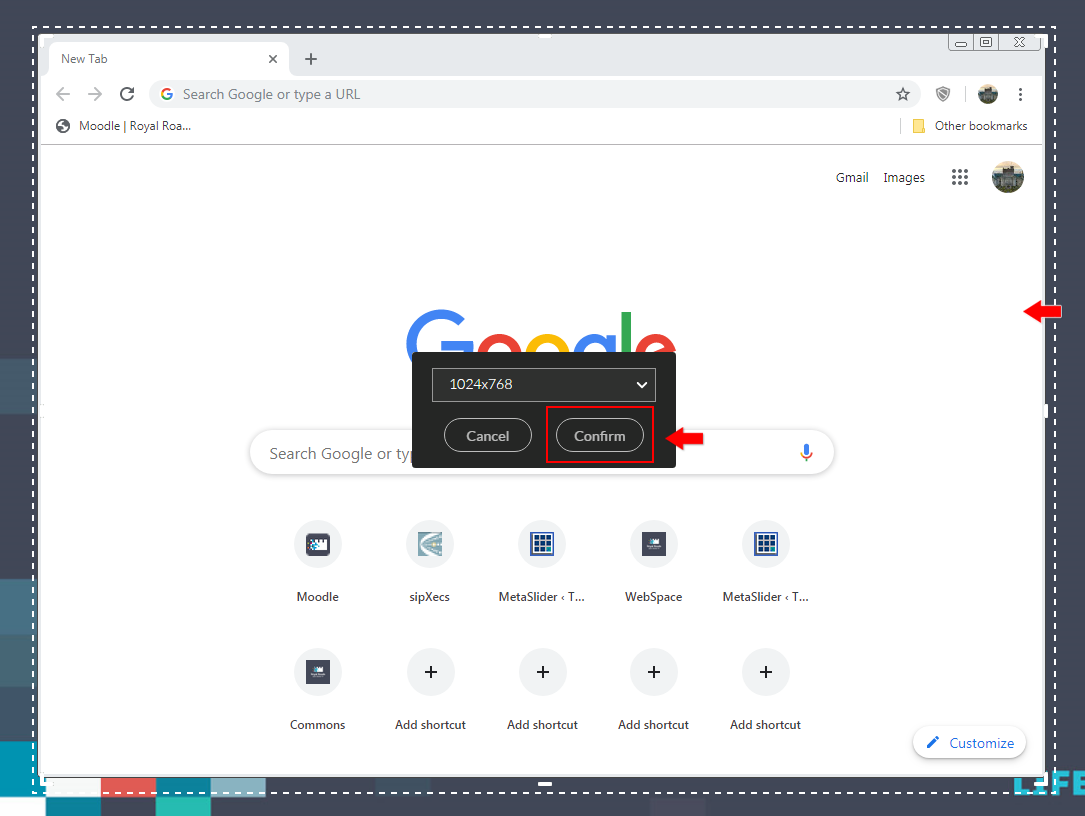
- If you've selected Select Area click the Select Area button, which will prompt you to select a window size for recording.
...
- Choose on of the following size options from the drop down menu (it will be easier if you choose one of the predefined sizes) and click Confirm.
- Open the browser window or application that you will be recording.
- Drag your browser window or application window into the dashed lines of the recording window area.
- Resize the browser window or application so it fits inside the recording area. This will be easier than dragging the dashed lines of the recording window out. Also, using Note: Using one of the listed sizes makes it easier to re-record, you don't have to drag out the custom size again.
- Click Confirm when ready.
- If you want to resize the recording window to make a custom size, hover over the dashed lines and when an arrow shows up, click and drag to resize.
...

