Topics Covered In This Article
...
A screencast is a recording of what is on your computer screen, often containing audio narration. Another name for a screencast is video screen capture or screen recording. Screencasts are useful for how-to-guides, narrated demonstrations, course tours, tutorials, slideshows, etc.
| Anchor | ||||
|---|---|---|---|---|
|
...
1. Open Capturespace
...
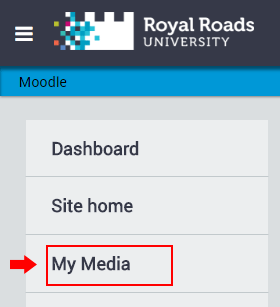
From Moodle, click on the User menu in the top right and click My Media.
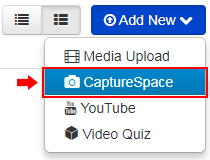
- From the My Media window, click on Add New and then CaptureSpace.
- If you’ve already installed CaptureSpace, it will launch automatically. Otherwise, please refer to Moodle My Media - Installing CaptureSpace.
2. Select SCREEN in the CaptureSpace recorder
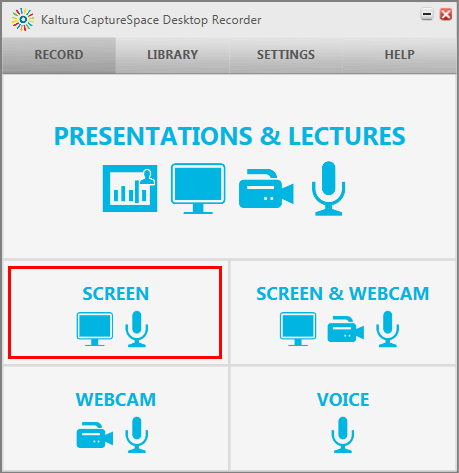
- The CaptureSpace Desktop recorder (pictured below) will open. With the CaptureSpace Desktop Recorder window open, select Screen to record a screencast. If you would like to include your webcam in the corner of your recording you may select Screen & Webcam.
3. Click RECORD to start recording
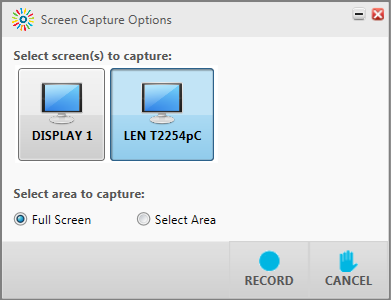
- You may need to select which screen to record from and whether to record full screen or a selected area of one screen. If you've selected Full Screen click the Record button. If you've selected Select Area click the Select Area button, which will prompt you to click and drag the rectangle of the screen that will be recorded.
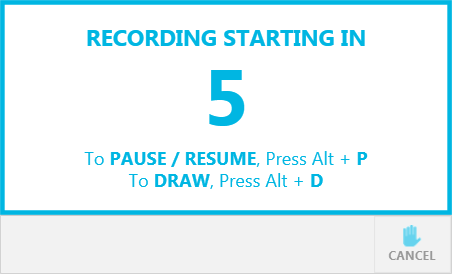
- A five-second countdown timer will indicate when recording will begin. To ensure that nothing is cut off from the beginning, it is a good idea to wait an extra second before you begin speaking.
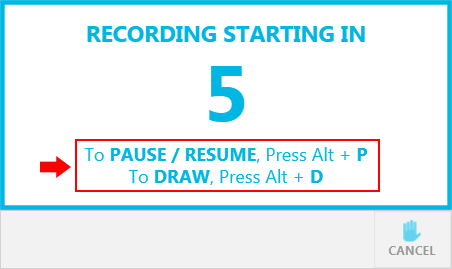
- You may pause and resume the recording by pressing Alt + P.
- You may also draw on your screen by using Alt + D, and this drawing will appear in the recorded video.
4. Click DONE to finish recording
- It's recommended that you pause your video with Alt + P and then stop it to avoid the screen capture controls from appearing in the video.
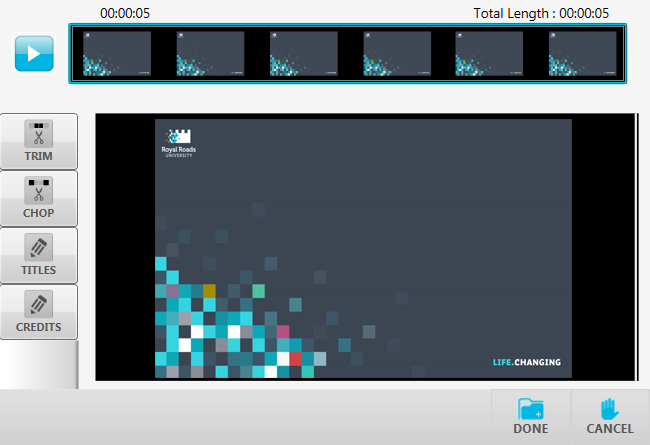
- Use the Recording Screen Capture controls to stop your video. If you know you want to delete your recording and start again you may click Cancel. Click Done to move on to reviewing your video.
- If you'd like to edit your CaptureSpace recording please refer to Moodle My Media - Editing CaptureSpace recordings.
- If you do not wish to edit your recording, click Done.
5. Name & save your recording
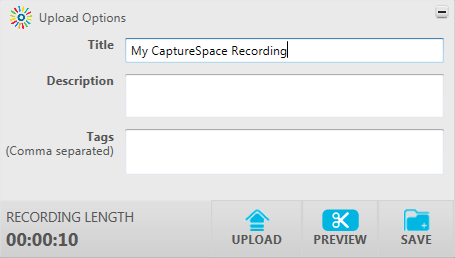
- Give your recording a title in the Title field.
- Optionally, you may add a description and tags.
- Clicking UPLOAD will upload the recording to My Media and save it in the CaptureSpace library.
- Clicking PREVIEW will take you back to the editing window.
- Clicking SAVE will save it in the CaptureSpace library where you can upload it to My Media later.
...
